In this section, you will learn how to:
- Backup your Quickbooks data
- Set up users and passwords
- Manage your accounts
- Set up classes
- Manage your customer information
- Manage your vendor information
- Manage your items
- Enter historical transactions
Completing Your Business Setup
Backing Up Your Data
Once you’ve completed the business setup process, you should back up your QuickBooks file:
- Click the Backup button
 on the QuickBooks toolbar. You can also click the Backup icon in the Company Navigator or select Back Up from the QuickBooks File menu.
The QuickBooks Backup dialog box opens.
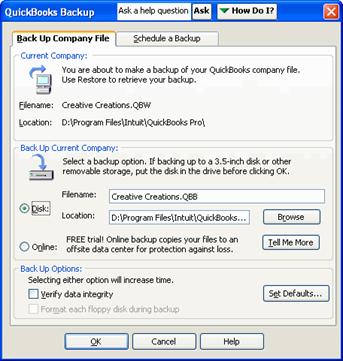
- Under Back Up Current Company, make sure Disk is selected. Then click the Browse button to browse to the location where you want to save the backup file.
- Click OK.
It’s a good idea to schedule automatic backups, so the data in the backup file is kept up to date. You can have QuickBooks automatically back up your file when you exit the program:
- In the QuickBooks Backup dialog, select the Schedule a Backup tab.
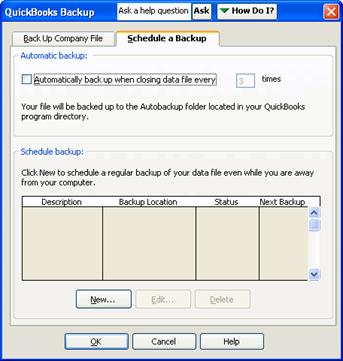
- Select the checkbox under Automatic backup (Automatically back up when closing data file every); then enter the frequency with which you want to back up the data. For example, enter 3 to have QuickBooks back up the data every 3 times you exit the program.
- Click OK.
Creating an Automatic Backup in Quickbooks
You can also schedule QuickBooks to create a new backup file at the days and times you specify; in this case, QuickBooks will save a specified number of backup files:
- In the QuickBooks Backup dialog, select the Schedule a Backup tab.
- Click the New button.
- In the Schedule a Backup dialog, enter a description for the backup. This will appear in the list of scheduled backups in the QuickBooks Backup dialog.
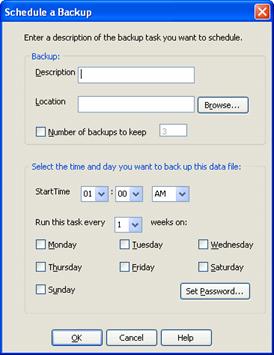
- Click the Browse button to browse to a folder where you want to keep the backup files.
- If you want to limit the number of backup files to keep, select the Number of backups to keep checkbox and enter the number of files you want to save. Otherwise, QuickBooks will save all the backup files.
- Select the start time and frequency for creating the backups.
Note: When QuickBooks backs up the data, your computer must be running and you cannot be using the company file that’s being backed up.
- Some platforms require a password for the Windows user logged in while the backup is being performed. To enter your Windows login password, click the Set Password button. Confirm that the correct Windows user name is entered and enter your password; then click OK.
- Click OK to save the new backup schedule.
- Click OK to close the QuickBooks Backup dialog.