Navigating in Quickbooks
In this section, you will learn how to:
- Use the Quickbooks interface
- Use the toolbars and shortcuts
Navigating in QuickBooks
The QuickBooks interface uses “navigators” to group related tasks and information, such as company information, customer information and vendor information. The navigators are listed on the left-hand side of the QuickBooks window:
When you click on a navigator in the list, the main window for that navigator opens:
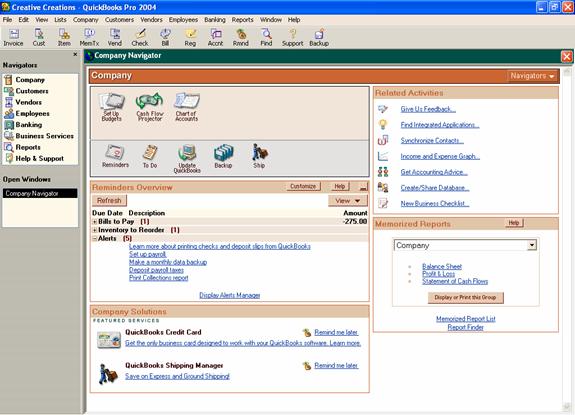
The Company Navigator, shown above, displays icons you can select for accomplishing particular company-related tasks, such as setting up budgets or opening the Chart of Accounts.
Each navigator is divided into panels that group related tasks or information. The primary navigators-Company, Customer, Vendor, Employee and Banking-each have panels for tasks (containing icons), related activities, memorized reports and solutions (a kind of QuickBooks marketplace). You can click on an icon or a hyperlink in any of these panels to open the linked window.
Each time you open a new window, QuickBooks displays it in the Open Windows list on the left-hand side of the QuickBooks window:
To move between open windows, simply click on a window in the list.
To close an open window, click the close button ![]() in the upper right-hand corner of the window. Make sure you aren’t clicking the close button in the upper-right corner of the QuickBooks window; this will close QuickBooks entirely.
in the upper right-hand corner of the window. Make sure you aren’t clicking the close button in the upper-right corner of the QuickBooks window; this will close QuickBooks entirely.
All of the options available in the navigators can be accessed from the QuickBooks menu bar, which also groups related tasks, such as company tasks, customer tasks and vendor tasks.
In addition, QuickBooks includes a toolbar that provides quick access to the commands you’ll use most frequently:
![]()
- Click Invoice to create invoices for customers.
- Click Cust to open your customer list, where you can add, edit and delete customer information.
- Click Item to open your item list, where you can add, edit and delete item information.
- Click MemTx to open your memorized transaction list, where you can add, edit and delete memorized transactions.
- Click Vend to open your vendor list, where you can add, edit and delete vendor information.
- Click Check to write checks.
- Click Bill to pay bills.
- Click Reg to view and work with your account registers.
- Click Accnt to open your chart of accounts, where you can add, edit and delete account information, and enter transactions for accounts.
- Click Rmnd to view your reminders list.
- Click Find to search for transactions.
- Click Support to open the Help & Support window.
- Click Backup to back up your company file.
In this section, you learned how to:
- Use the Quickbooks interface
- Use the toolbars and shortcuts