Aligning Text
Word has four options for aligning text: Left ![]() , Right
, Right ![]() , Center
, Center ![]() , and Justify
, and Justify ![]() . These buttons appear in the Paragraph group on the Ribbon’s Home tab. Because text is aligned in relation to the paragraph margins, any alignment you apply to a text selection will be applied to the entire paragraph.
. These buttons appear in the Paragraph group on the Ribbon’s Home tab. Because text is aligned in relation to the paragraph margins, any alignment you apply to a text selection will be applied to the entire paragraph.
By default, the text you type is left-aligned-that is, it is aligned along the left margin.
Tip:
Because Word inserts additional spaces when justifying text, justification is not normally recommended for professional formatting in Word.
Indenting Text
To quickly indent text in Word, use the Increase Indent ![]() Â button in the Paragraph group of the Ribbon’s Home tab. Word indents the paragraph by one tab stop each time you click the button. To decrease the indent, click the Decrease Indent
 button in the Paragraph group of the Ribbon’s Home tab. Word indents the paragraph by one tab stop each time you click the button. To decrease the indent, click the Decrease Indent ![]()  button.
 button.
Note:
You can use these buttons to change the level of text in a numbered outline, as well. For instance, if Level 2 is indented by one-quarter inch and Level 3 is indented by one-half inch, and you want to change a Level 2 paragraph to Level 3, click the Increase Indent button (with the insertion point positioned somewhere in the text). Word changes the level of the text, increasing the indent as appropriate, and adjusting the numbering or bullet style as appropriate.
Tip:
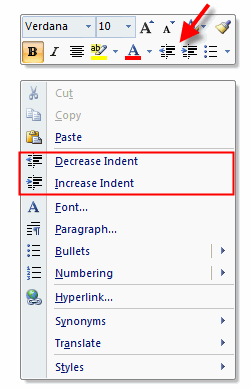
You can also increase and decrease indentation from the toolbar and shortcut menu that appear when you right-click on the page:
Word’s ruler makes it easy to specify a particular indentation for both the left and right margins. Simply position the cursor inside the paragraph you want to change and then click and drag the Left Indent or Right Indent marker to the place on the ruler where you want the text to begin or end. (If the ruler isn’t displayed, select the View tab on the Ribbon, and then select the Ruler checkbox in the Show/Hide group.)
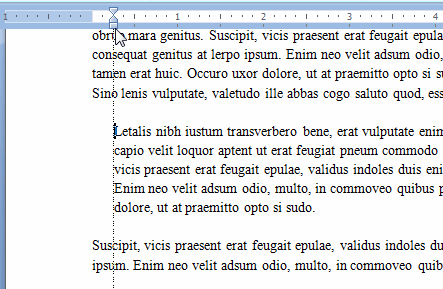
The upper and lower Left Indent markers on the ruler can be moved separately; the upper marker represents the paragraph’s first line, and the lower marker represents the remainder of the paragraph. Drag the upper marker apart from the lower one to create a hanging indent:
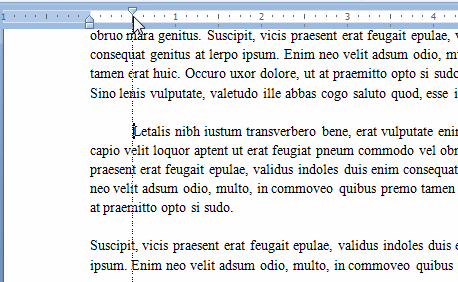
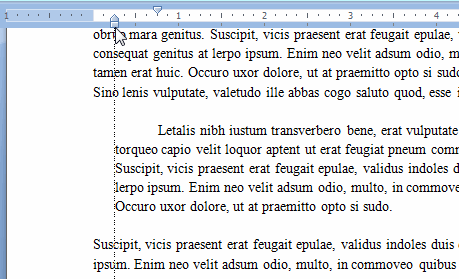
You can then move the entire hanging indent in from the existing margin by dragging the small box beneath the markers. This box moves both markers at once.
Tip:
The Ribbon’s Page Layout tab includes fields for entering specific indentation values:

As in previous versions of Word, the same indentation options are available in the Paragraph dialog box. To open it, click the small arrow in the lower right-hand corner of the Paragraph group on the Ribbon’s Home tab:

Or, right-click on the text you want to change and select Paragraph from the shortcut menu.
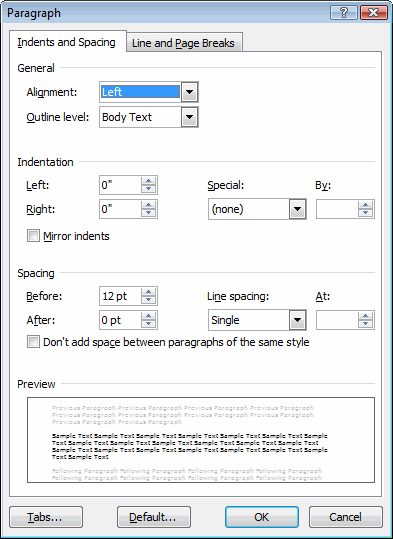
Change the left or right indentation by entering values into the Left and Right fields. You can enter positive or negative numbers. Negative numbers extend the text beyond the current margins. Selecting Mirror indents applies the values to the inside (rather than left) and outside (rather than right) margins of facing pages.
Use the Special menu to create a hanging or first-line indent. You can specify the precise indentation by entering a value into the By field. For example, entering 0.5″ (the default), moves the first line of the paragraph in by half an inch.
Notice that in the Preview pane, Word shows you how the text will appear relative to the surrounding paragraphs.