Creating Bulleted and Numbered Lists
Bulleted and numbered lists can be created with the simple click of a button. Word automatically numbers and formats your lists, even through complex outlines.
To create a bulleted or numbered list:
1. If you’ve already typed your list, select it-all lines. If you haven’t, place your cursor where you want to begin the list.
2. Click the Bullets ![]() button in the Paragraph group on the Ribbon’s Home tab.
button in the Paragraph group on the Ribbon’s Home tab.
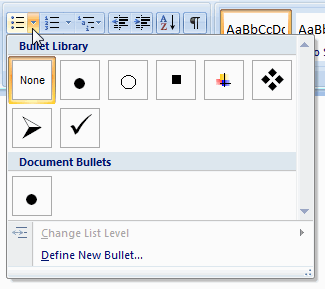
Word includes many types of bullets to choose from, as well as the ability to define your own. To see the Bullet Library, click the arrow to the right of the Bullets button:
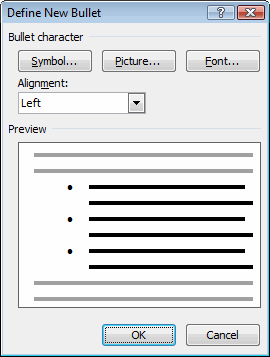
To define your own bullet, select Define New Bullet. This opens the Define New Bullet dialog:
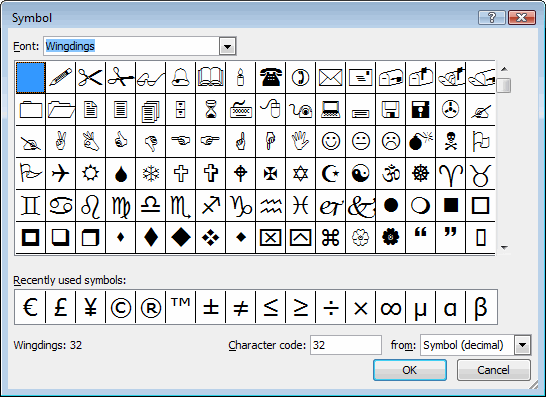
· Clicking the Symbol button opens the Symbol dialog, which contains special characters associated with the selected font, in this case, Symbol. You can choose a different font, which has different symbols; for example, Wingdings has a number of icons related to documents, mail and sign language, among other things:
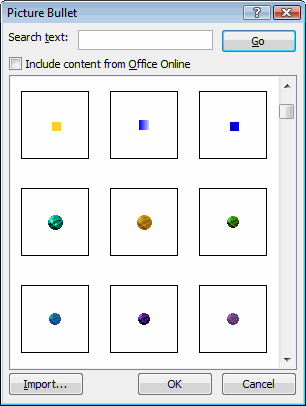
· To use an image as a bullet, click Picture. This opens the Picture Bullet dialog, which contains a list of bullet images packaged with Word.
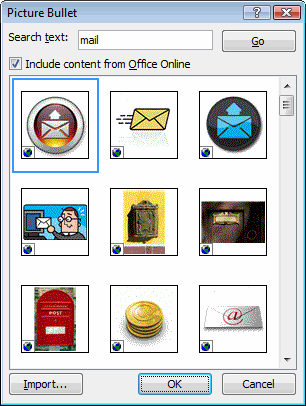
Many more images are available from Office Online, and you can search through them by typing a search term (e.g., “mail”) into the Search text field. Be sure to check the Include content from Office Online box to search all the images available for download.
If you’ve created or downloaded your own image, you can import it from this dialog as well, by clicking the Import button. In the Add clips to Organizer dialog, navigate to your image and click Open to import it.
· To set font properties for bullets, click the Font button.
· You can also set the alignment for your bulleted list by selecting it from the Alignment field.
Numbered list work virtually the same way:
1. Select your list, or place your cursor where you want the list to begin.
2. Click the Numbering button ![]() Â in the Paragraph group on the Ribbon’s Home tab.
 in the Paragraph group on the Ribbon’s Home tab.
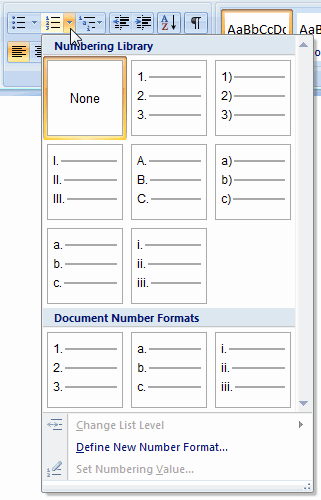
As with bullets, Word lets you customize your numbered list. To open the Numbering Library, click the arrow to the right of the Numbering button:
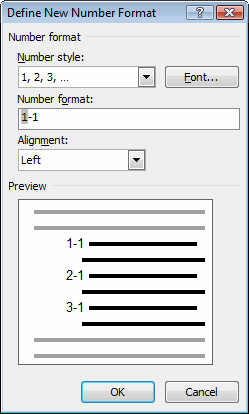
To define your own format, select Define New Number Format. In the dialog that opens, you can select a number style as well as customize the format. For example, you might want to use a decimal format for your numbering, such as “1.0,” “2.0,” etc. Note that the number Word automatically uses for a list item is shown as a field, while anything you add to the Number format field will remain the same for each number. So to number items 1.0, 2.0, 3.0, and so on, you would add a “0” after the decimal point. You could also delete the decimal point and use a dash, or put a number and a decimal point before the number field.
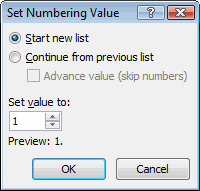
You can also tell Word to start numbering the list with a value other than 1; just position your cursor at the list item you want to set and select Set Numbering Value from the Numbering button menu. In the dialog that opens, enter a number in the Set value to field. Or, you can choose Continue from previous list to resume numbering from the last list. If you also check Advance value, you can enter a number into the Set value to field so Word skips numbers between the last list and the current one.
Tip:
The right-click menu offers a quicker way of resuming and restarting numbering. Just position the cursor in the list item, right-click, and then select Continue Numbering to resume numbering from the previous list, or Set Numbering Value to restart the current list.
In addition, when you apply numbering to a line after Word thinks a list has ended, a small Autocorrect icon appears next to it; clicking it gives you the option to continue numbering from the previous list (or to restart numbering, if Word has automatically continued the previous list):

As you type your list, Word automatically formats and numbers each line, adding a new number (or a bullet, for bulleted lists) each time you press Enter. If you delete or insert a new line, Word adjusts the numbering appropriately. When you’re ready to end the list, just press Enter (or click the Numbering or Bullets button) again. This deletes the number or bullet and the list formatting from the previous line.
Word can also create and maintain multilevel lists automatically. Multilevel lists are used for outlines and can be customized to use any format of numbers, letters, icons or a combination of these. Word automatically numbers each level within the list:
1. Select your list, or place your cursor where you want the list to begin.
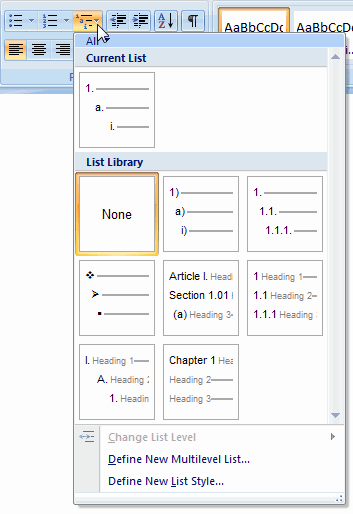
2. Click the Multilevel List button ![]() in the Paragraph group on the Ribbon’s Home tab.
in the Paragraph group on the Ribbon’s Home tab.
This opens the List Library, where you can choose a predefined format for the list, or define your own.
To define your own, select Define New Multilevel List from the menu.
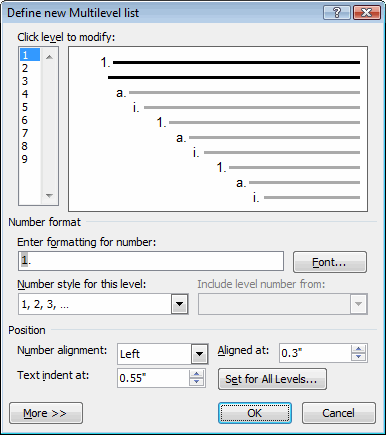
The key to using this dialog is to pay attention to the level list on the left and the preview beside it. At first, Level 1 is selected. All of the choices you make in the lower portion of the dialog will affect Level 1. As with single-level lists, you can customize the numbering format by adding numbers after the decimal point or before the number field, which represents the number Word will automatically update in the list. You can also set the font and choose a number style, and then position the list items at this level by setting the alignment and indent. The Aligned at field represents how far in from the margin the number will appear, while Text indent at represents how far in the remainder of the text appears.
As you make changes, watch the preview field to see how they impact the text. When the lines for the current level look the way you want them, you can move to the next level. To do this, all you have to do is select it in the list on the left. So, with 2 selected, you can adjust the settings, and so on, until you’ve customized all the levels you intend to use. You don’t have to define all the levels you see-only the ones you plan to include in your list.
Advanced options are also available if you click the More button.
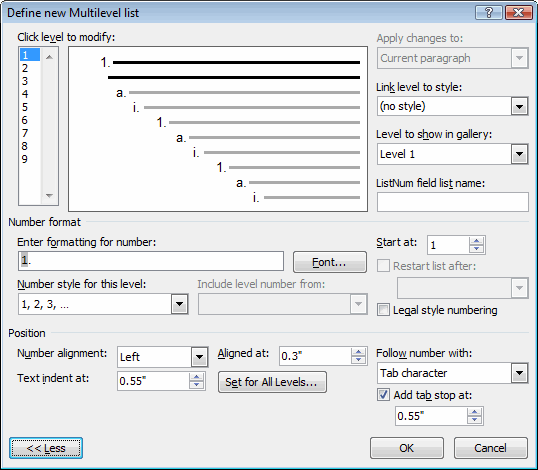
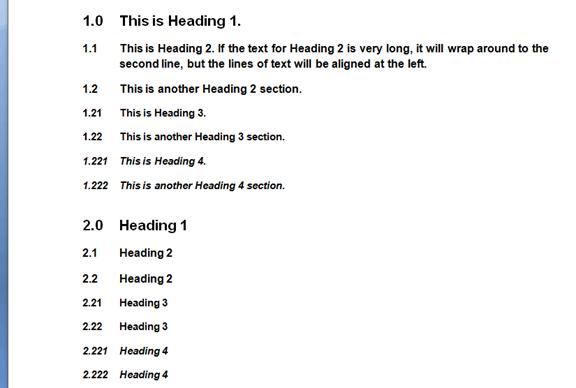
For example, Link level to style lets you link the list level to a style defined in your document, such as Heading 1, which you might link to Level 1, Heading 2, which you might link to Level 2, etc. When you link a level to a style, the formatting for the style is adopted for the level and when you apply the style to text on your page, Word automatically assigns it to the appropriate list level. That way you don’t need to restart or redefine numbering every time you start a new section of your report-Word tracks it automatically and applies the correct list level and number to each heading and subheading. All you have to do is apply the heading styles, and in this case, Word does not continue the numbering when you press Enter-it waits until you apply a style to the new line to determine which list to continue, if any.
However, defining the settings to update numbers at multiple levels can be tricky, and the best way to understand how it works is to see it in practice. These steps set up automatic numbering and indenting for a document with headings numbered 1.0, 1.1, 1.11 and 1.111. We’ll assume the four heading styles are already defined the way we want the font and paragraph spacing to appear. The styles are Heading 1 (for each chapter of our fictional report), Heading 2, Heading 3 and Heading 4. To define the numbering for the headings:
1. Click the Multilevel List button and select Define New Multilevel List.
2. Click the More button to expand the dialog box.
3. With 1 selected in the level list, open the Link level to style drop-down menu and select Heading 1.
4. Make sure Start at is set to 1 and in the field labeled Enter formatting for number, add a 0 after the decimal point. Chapter headings in the report will now be labeled 1.0, 2.0, 3.0 and so on.
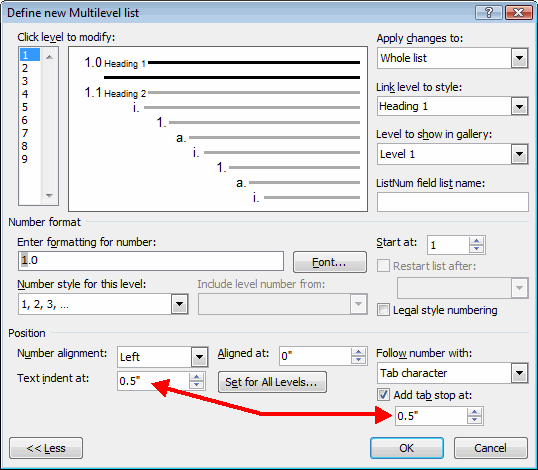
5. Let’s align the heading with the left margin. Leave Number alignment to Left and change Aligned at to 0″ to move the heading to the edge of the margin, aligned with the body text on the page.
6. Finally, to keep the hanging indent neat, we’ll set a tab stop at half an inch and indent any lines that wrap below the first to align with the tab stop. Word gives you a choice of separating the text from the number in the list item using a tab or a space (or nothing at all), but it can be next to impossible to line up indented lines that begin after a space. Below, a tab stop is added at .5″ and the text is set to indent to the same place:
7. That does it for Level 1. Select 2 in the list.
8. Under Link level to style, select Heading 2.
9. Under Number style for this level, select 1,2,3.
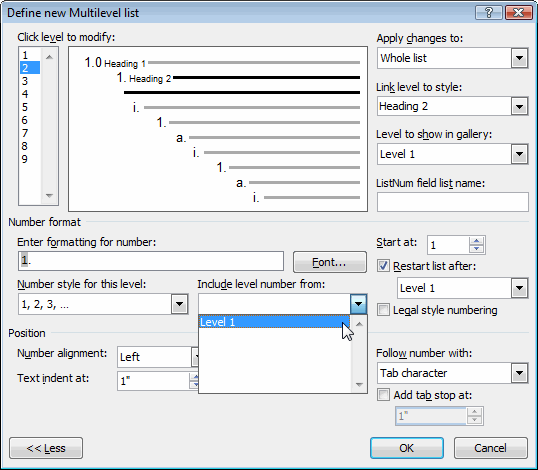
10.Make sure Start at is set to 1 and Restart list after is checked and Level 1 is selected below. The “start at” number reflects the second-level number being updated; our list items using Heading 2 will be numbered 1.1, 1.2, 1.3 and so on, to reflect a “new” list in Chapter 1 (Heading/Level 1), but you can ultimately customize your numbering however you like.
11.Because we also want Word to update the Heading 1 number for each chapter (so Heading 2 in Chapter 2 is numbered 2.1, 2.2, 2.3, etc. and Heading 2 in Chapter 3 is numbered 3.1, 3.2, 3.3, etc.), we have to include the Heading 1 level number in our Heading 2 list items: under Include level number from, select Level 1.
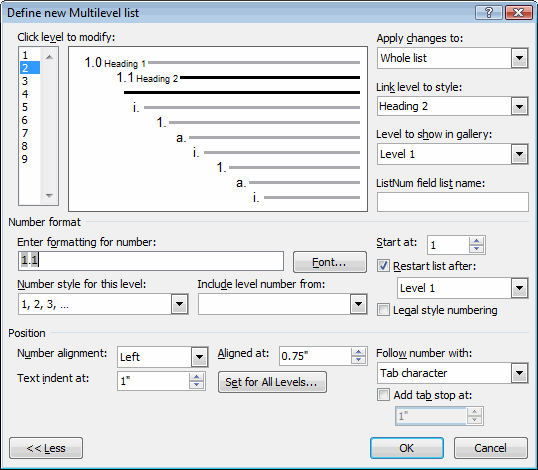
Word inserts a field under Enter formatting for number, but typically the field appears directly in front of the existing field; Word leaves the decimal point at the end. To fix this, just delete the decimal point and insert one between the two number fields. The dialog box should now look like this:
If we hadn’t selected this option and just inserted the number 1 before the field, Word wouldn’t update the chapter numbers in our Level 2 lists-every chapter would have Level 2 lists numbered 1.1, 1.2, etc.
12.Finally, we can adjust the tab stop and alignment and indent. To keep it simple, change the settings to match Level 1, with Aligned at set to 0″ and Text indent at and Add tab stop at set to .5″. (To enable the tab stop field, check the box first.)
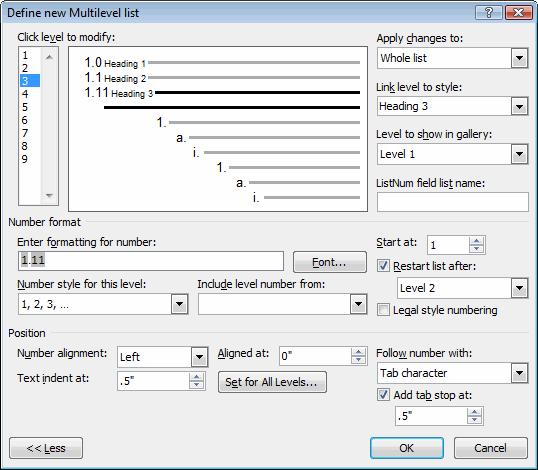
13.We’ll follow the same process for Level 3 and Level 4. For Level 3, select 3 in the list and link it to Heading 3. Select the 1,2,3 number style and make sure Start at is set to 1 and Restart list after is set to Level 2. This ensures each Level 3 list will start over when the Level 2 number changes, rather than the numbering being continued from section to section.
This time, we have to tell Word to include both Level 1 and Level 2 in the numbering. Under Include level number from, select Level 2 to add a Level 2 autonumber to the field above. Then, position the cursor before both fields and select Level 1 from Include level number from. Now there should be three autonumber fields, and the cursor should be positioned in the right spot to add the decimal point, just after the first field. Once you’ve done that, delete the decimal point from the end.
Finally, set the tab stop, alignment and indent to match the others. The dialog box should look like this:
The settings for indent and tab stop create hanging indents, so when you create a new numbered line, Word automatically begins the text at the tab stop, and then indents the remainder of the text. You can use these settings to keep text neatly aligned, as well as to indent progressive levels in your outline.
14.For Level 4, repeat the process, but link the level to Heading 4, and under Start at, make sure Restart list after is set to Level 3. Under Include level number from, select each level in turn until all four number fields appear above. Move the decimal point to just after the first field.
Note:
When adding the autonumber fields, make sure you position the cursor in the place where the number for that level should appear. If you’re inserting fields in reverse order (3, 2, 1), then you should move the cursor to the left after you insert each field.
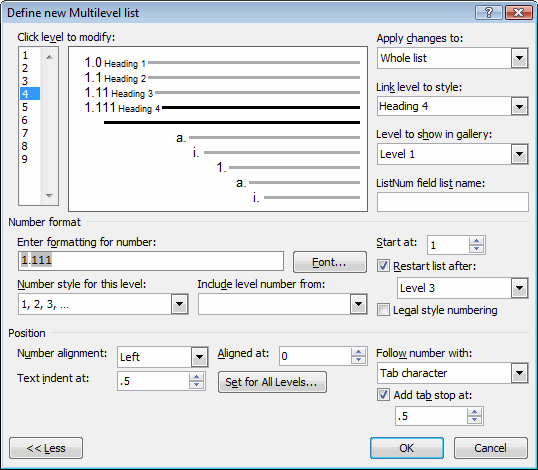
Finally, set the tab stop, alignment and indent to match the others. The dialog should look like this:
15.Click OK.
With the multilevel list defined, you can type some text in a document to see how Word numbers the various headings and subheadings. For each line you type, apply the Heading 1, Heading 2, Heading 3 or Heading 4 style: