Arranging Text in Multiple Columns
To arrange text in columns:
- Select the text you want to arrange in columns, or position your cursor where you want to begin the columns.
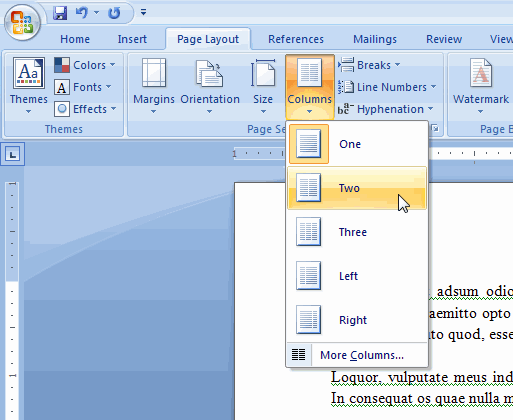
- On the Ribbon, select the Page Layout tab.
- In the Page Setup group, click the Columns button and select the number of columns you want to use.
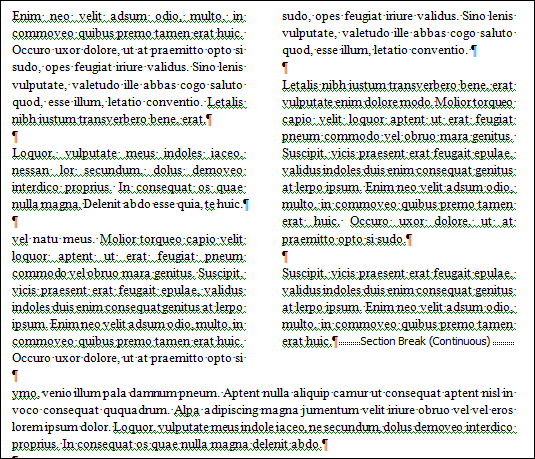
Word arranges the selected text in columns and automatically inserts a continuous section break separating the columns from the surrounding text. To format the text in the columns, be sure you click inside that section break. To see the break, click the Show/Hide ![]() Â button in the Paragraph group on the Ribbon’s Home tab to display hidden formatting symbols.
 button in the Paragraph group on the Ribbon’s Home tab to display hidden formatting symbols.
To keep your columns even, you may need to force the last line of the first column to the top of the second column. To insert a column break, place your cursor where you want the break and then press Ctrl + Shift + Enter.
For formatting options, select More Columns at the bottom of the Columns button menu. This opens the Columns dialog, which you can use to set column width and spacing, add a line between columns, or change the number of columns:

Tip:
You can use this dialog to format existing columns or to arrange single-column text into multiple columns, bypassing the quick choices in the Columns button menu.
Adding Page and Section Breaks
Use a page break to start a new page in your document without adding extraneous hard returns; hard returns, or paragraph breaks, are notorious for causing pagination issues when text is inserted or deleted. A column break, like a page break, forces text to the next column, effectively ending the current one.
Section breaks are similar to page breaks, but they divide the formatting of your document into sections. Each section can use a different page layout, size, and orientation, as well as different headers and footers, to name just a few examples. And you don’t have to begin a section break on a new page.
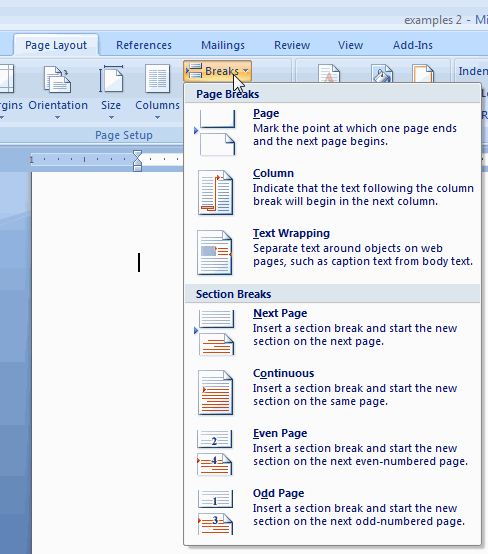
- Next page starts a new section on the next page.
- Continuous starts a new section on the same page, where you insert the break.
- Even Page and Odd Page start a new section on the next even- or odd-numbered page. If the preceding section ends on a page of the same number type (even or odd), then Word inserts a blank page. The blank page is not displayed on-screen, but it is included when the document is printed. This is handy, for example, when creating books or booklets and you want the first page of each chapter to begin on an odd page.
To insert a break, just position your cursor where you want to insert it and then select the break type from the menu.
Tip:
When working with section breaks, it’s useful to show formatting symbols, so you can see the break itself. Without seeing it, it’s possible to inadvertently delete it and all the formatting along with it. To show formatting symbols, click the Show/Hide button ![]() Â in the Paragraph group of the Ribbon’s Home tab. Section breaks appear in the document as double dotted lines:
 in the Paragraph group of the Ribbon’s Home tab. Section breaks appear in the document as double dotted lines:

Although you can certainly use this menu to insert page and column breaks, it’s much quicker to use Word’s hotkeys, and you won’t interrupt your flow of typing:
- To insert a page break, press Ctrl + Enter.
- To insert a column break, press Ctrl + Shift + Enter.
Tip:
If you need to, you can change the type of an existing section break. For instance, if you have a long document with breaks between major sections, you may want each section to begin on an odd page. You can do this without inserting blank pages by changing the section breaks to odd page breaks:
- Position the insertion point inside the section whose type you want to change.
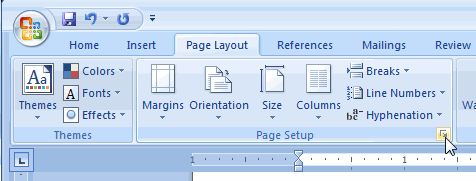
- On the Ribbon’s Page Layout tab, click the small button in the lower right-hand corner of the Page Setup group. This opens the Page Setup dialog to the Layout tab.
- From the Section start menu, select the section break type you want to use.
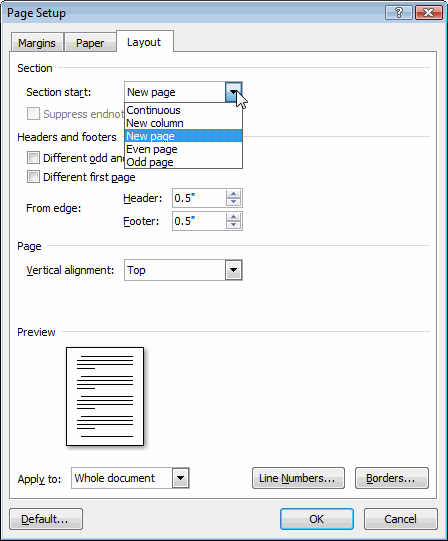
- Click OK.
To delete a section break, position your cursor right before it and press Delete on your keyboard. (If you don’t see the section break, click the Show/Hide button ![]() Â in the Paragraph group on the Ribbon’s Home tab to display hidden formatting symbols.) Be careful! When you delete a section break, you delete all the formatting for the preceding section.
 in the Paragraph group on the Ribbon’s Home tab to display hidden formatting symbols.) Be careful! When you delete a section break, you delete all the formatting for the preceding section.