This tutorial is intended to meet the needs of the new user, as well as provide hints for more experienced users. If you have been using MS Word and would like to get more familiar with the advanced functions, return to the menu to select the topic of your interest. Although this tutorial is designed for MS Word 97, it may help you with Microsoft Word 2000, or 95.
As a new user the first thing you’ll want to get familiar with is the toolbar. The standard toolbar is located at the top of the screen with icons on it and the formatting toolbar is located directly below the standard toolbar. To get familiar with the each, take your mouse and hover over each of the buttons in Microsoft Word. The help assistant will tell you what they do.
You can customize your toolbar, by adding additional icons to your standard or formatting toolbar. A couple of tasks that I have chosen to add are: change case, grow font and shrink font. You’ll want to choose from the menu, View, Toolbars, Customize. Then choose the command tab, highlight format, and you will see various functions that you can add. Highlight change case, and drag it up to your formatting toolbar and place it in between any icon. Do the same for grow font and shrink font.
Templates are pre-set documents that allow you to “fill-in” information. This is useful when you may want to create the same type of document over and over.
Word ’97 provides several templates for creating professional documents for memorandums, faxes, resumes, newsletters, and more. To use a template, click on File, New and you will see the following screen:
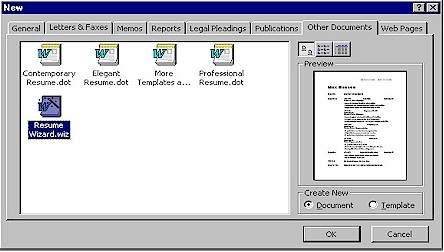
If you can use one of the templates listed, it will save you some time. If not, you can always select Blank Document on the general tab or hit the New button on the standard toolbar. You can also create your own template by selecting “Create New: Template” at the bottom-right of your screen.
Once you have a blank document, you’ll want to type some text and try out the formatting features available on the format toolbar: font size, bold, italic, underline, align left, center, align right, justify, numbering, bullets, increase indent, and decrease indent.
To format bullets and numbering, you can highlight your bulleted or numbered text, and either right mouse click or select Format from the toolbar, then select Bullets and numbering. Then you can change to square bullets, triangular bullets, or number by 1,2,3 or a,b,c. If you want to change the number that you start with, or the indentation, select Customize. Once you choose Customize, you can choose your font, number style, starting number, number position, number alignment, and text alignment. If you choose Customize for bullets, you can choose your font, bullet, bullet position and text position.
To format a paragraph, highlight your text, either right mouse click or select Format from the toolbar, then select Paragraph. At this point, you may choose your indents and line spacing. To change to double space, select double from the Line spacing arrow.
To insert a date and time, that is automatically updated, select Insert, Date and Time, choose the format that you want, check the Update automatically box, and then hit okay.
To add a date and time, or any other field to a Header or Footer, select View, Header and Footer. At this point, you can choose to add autotext, such as a filename, or you can add page numbers, a date and time, or you can type the text that you want to add at the top or the bottom of the document.
Once you have a standard header and footer, you may want to save this as a template for future use. To do this, select File, Save as, then select Save as type: Document Template (*.dot). This will now be listed in your templates, when you select File, New.