AutoText in Word 2007
If you prefer to use the AutoText gallery from previous versions of Word, you can add it to the Quick Access toolbar:
- Click the Microsoft Office button
 .
. - Click Word Options at the bottom of the menu.
- In the Word Options dialog, select the Customize category.
- Under Choose commands from, select All Commands, and then scroll through the list to select AutoText:
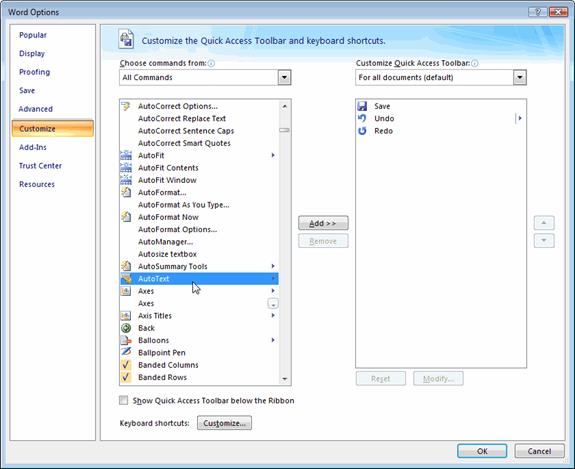
- Click the Add button to add it to the list on the right.
- Click OK.
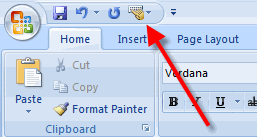
The AutoText button now appears in the Quick Access toolbar:
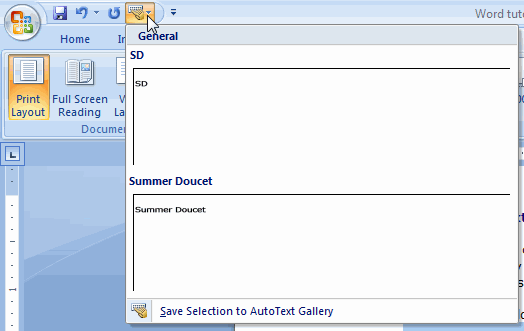
Clicking it opens the AutoText gallery:
The next step is to add reusable text to the gallery:
- First, type and format the text as you want it.
- Select the text.
- Click the AutoText button on the Quick Access toolbar.
- At the bottom of the gallery menu, click Save Selection to AutoText Gallery.
- In the Create New Building Block dialog, the Name field is automatically filled with the first few words of the selected text. If this is enough to help you recognize it later in the gallery, you can leave it as it is; otherwise, you can enter a different name.
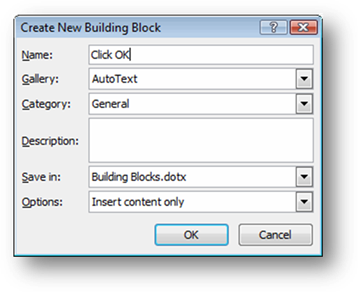
- Leave AutoText selected as the Gallery.
- The next few fields help you organize your AutoText; when you first begin adding to your gallery, there is only one category, General, but you can create new ones by selecting Create New Category from the Category drop-down menu. In the next field, you can enter a description to help you identify the purpose for the text. Word saves the AutoText in a file of other building blocks unless you specify a different one.
- From the Options menu, you can choose how you want your AutoText inserted: by default, it’s inserted at the cursor position, but you can choose to give it its own paragraph or its own page.
- Click OK.
The entry appears in the AutoText gallery. To insert it, all you need do is select it.
Tip:
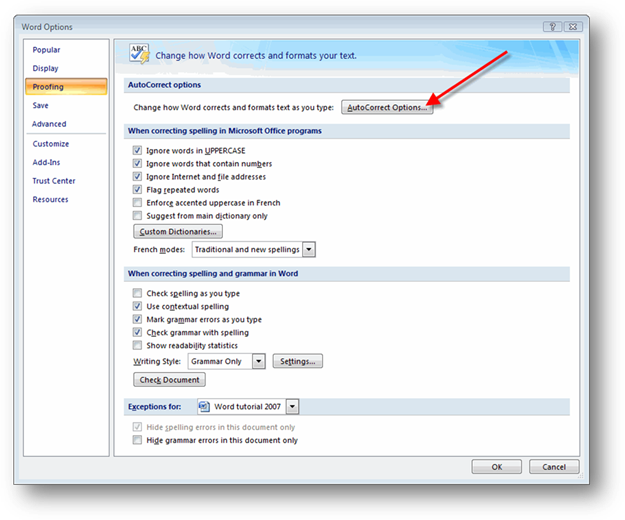
Don’t confuse AutoText with Word’s AutoCorrect options. AutoCorrect adds text based on the first few characters you type. You can add to Word’s database of AutoCorrect entries from the Proofing category of the Word Options dialog:
- Click the Microsoft Office button  and, at the bottom of the menu, click Word Options.
- In the Word Options dialog, select the Proofing category.
- Click the AutoCorrect Options button.
- Make sure Replace text as you type is selected.
- Under Replace, enter the first few letters-the text you want to replace.
- Under With, enter the full text you want Word to use in place of the initial letters.
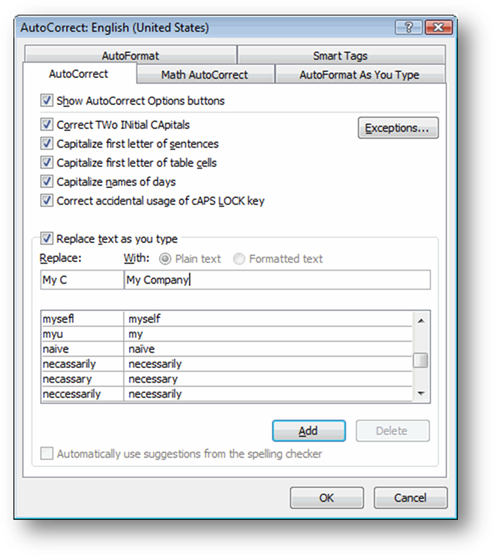
- Click Add.
- Click OK.