Section 3: Using Windows Vista
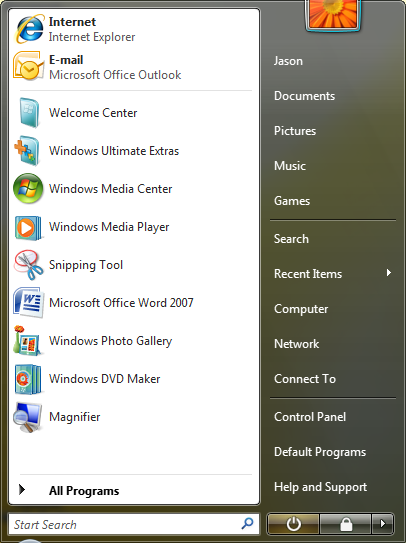
The New Start Menu
The Start Menu has a similar look and feel to the XP Start Menu, but does have several great improvements to enhance the user experience. For instance, Windows now has a Search feature located under the Start Menu, where you can locate any file by entering a single keyword or a string of words. This built-in search feature can assist with finding a picture, system file, document, or any other file on the computer. Windows indexes the computer and searches this index for any related terms, partial words, and more. In addition to the search feature, the Start Menu also handles expanding selections inside the same area, rather than expanding out across the desktop like the Programs folder would do in XP. There are also quick links to the Computer, Network, and more.
Using Windows Explorer
The Windows Explorer can be found by clicking the Computer link on the Start Menu. This brings up a window that explores the contents of the computer. The folders are shown on the left hand side, and the main window holds the drives for use. In the upscale versions of the operating system, there is a Recovery Drive which enables Windows to backup system settings to a separate partition on the hard disk.
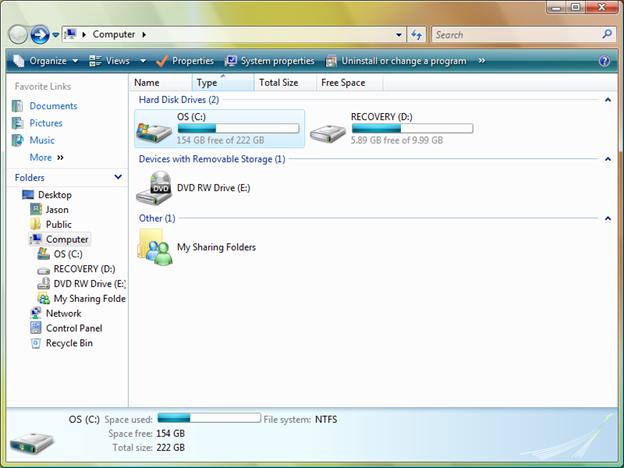
The folder tree on the left hand side allows users to flip through all the folders on the computer. The search feature is also available on the upper right hand side of the window, allowing for quick access to find files. The new Windows Explorer adds the option to Add or Remove Programs, review System Properties, and change views of the window.
Personal files are found under the User name. Let’s locate the Documents folder which holds many key documents for users.
1. Select the arrow next to the user name under the file folder list. ![]()
2. Select the arrow next to the Documents folder. ![]()
3. Click on the Documents folder to see the files and folders in the preview pane.
Exercise: Change the default view of the Windows Explorer to show extra large icons, using the Views button in the toolbar.
![]()
Burning Files
The majority of new computer systems come equipped with either a CD-RW or a DVD-RW. These drives allow users to easily backup and write files to CDs or DVDs. Using the Windows Explorer, users can easily burn a disk containing files from a specific location. Windows Explorer makes it simple to create a backup disk for your important documents, pictures, and videos.
1. Select the folder in the preview pane of Windows Explorer, with a single mouse click.
2. Choose Burn from the menu bar.
![]()
3. Enter a Disk Title for the volume.
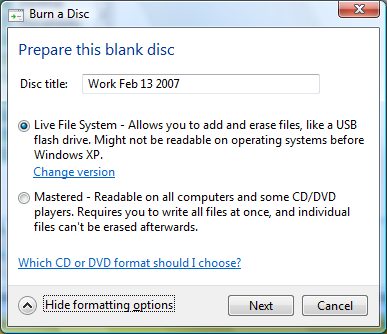
4. Select either Live File System, which allows you to remove, to add, and to change existing files on the disk or Mastered, which requires you to write the files once to the disk and then close the write functionality for that disk.
5. Choose Next.
6. Format the disk in the drive.
7. The files automatically write to the disk.
8. Remove the disk and label it.
9. Finished!
Exercise: Create a backup disk of your important files.