Section 5: Networking and Windows Vista
As we briefly discussed earlier, the network interface for Windows Vista seamlessly integrates into many different types of connections. Regardless of how the Vista machine connects to the internet, the setup is quite simple. For instance, if the Vista machine connects to a router or hub, then the network should appear automatically if the Network Discovery feature is turned to On. Let’s check to ensure that is the case.
1. Open the Control Panel.
2. Select the Network and Sharing Center.
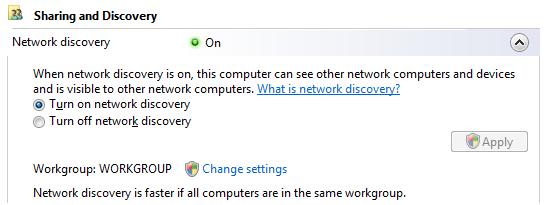
3. Check to ensure the green light is on for Network Discovery.
4. If it is not, turn on Network Discovery.
5. Enter the administrator password or click Continue if you are logged in as administrator.
The computer should automatically connect to any Network with the same workgroup name, but can also connect if the workgroup name is different. If an established network is in place at home, then the computer should use the same Workgroup name.
How to Change the Workgroup Name
The default Workgroup name for new installations is WORKGROUP. If for instance, the home network has a Workgroup name of SALLYSNETWORK, then we will want to change the Vista machine’s workgroup name to that.
1. Open the Control Panel.
2. Select the Network and Sharing Center.
3. Select the ![]() next to Network Discovery.
next to Network Discovery.
4. Select Change Settings next to Workgroup.
![]()
5. Click continue if logged in as administrator, or enter the administrator password.
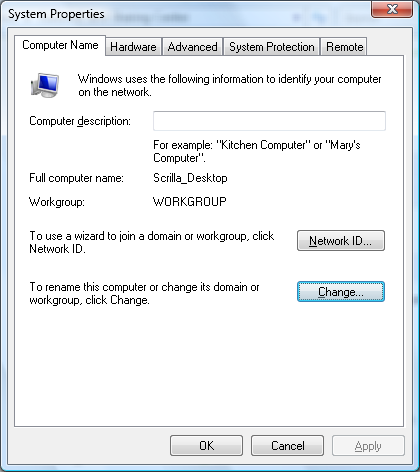
6. Click the Change button, where it says To rename this computer or change its domain or workgroup, click Change.
7. Change the Workgroup name at the bottom of the screen.
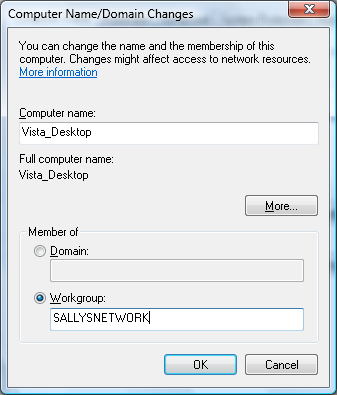
8. Click OK.
The Workgroup name has successfully been changed. Once this is done, the Network discovery should automatically detect any shared folders and printers on the Network.
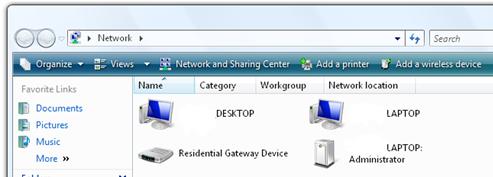
Let’s check to make sure we can see other folders and printers available on the Network.
1. Double click the Network Icon on the Desktop.

2. The available devices on the network should be accessible from this menu.
3. Double click any device to see the shared folders on that system.