Section 4: Sharing Files in Windows Vista
File and printer sharing in Windows Vista has intuitive features and can be easily configured. As with many households or businesses, certain computers control printers, while others store documents. Sharing between these computers can be helpful and is painless in Windows Vista.
Accessing File and Printer Sharing
1. Open the Control Panel under the Start Menu.
2. Select Setup File Sharing under the Network and Internet heading.
3. Be sure the options you wish to use are turned to ON in the Network Discovery area.
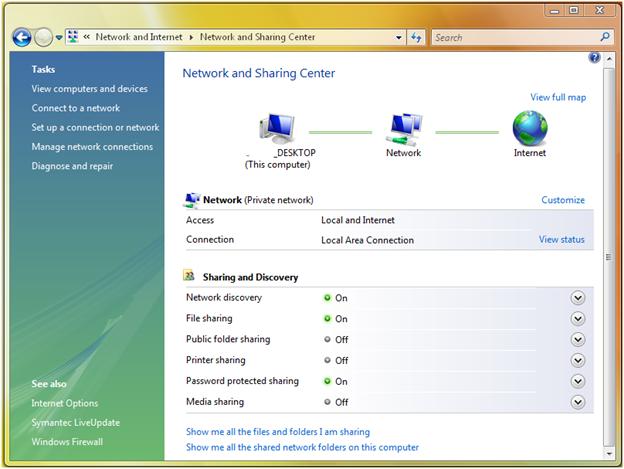
The Sharing and Discovery menu enables printer, file, media, password, and public folder sharing. If the feature has a lit green light and labeled on, then those features are working. To see the consequences of turning on and off each feature select the down arrow to view more about the settings.
Network Discovery
Turning this feature to On, enables the automatic detection of Workgroup computers on a network. Windows Vista automatically connects to these computers, allowing them to see the Vista machine and to interact.
File Sharing
By turning on this feature, users on the network can access files and printers current shared.
Public Folder Sharing
Turning this feature on allows users on a network to access publicly shared folders. The settings can be adjusted so only those with user account access can share files.
Printer Sharing
Turning this feature on enables users to have access to printers attached to this computer.
Password Protected Sharing
This option allows for only users with accounts to access the shared files and printers.
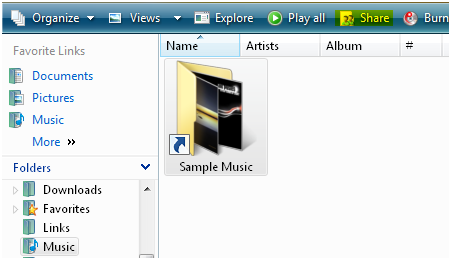
How to Share a Folder
There are many reasons why you may wish to share certain folders across your home network. For instance, the folder may hold your important documents that you wish to access from both your desktop and your laptop. Rather than keep the files on two separate drives, accessing the files and modifying them over the network makes changes and updates that much simpler.
The files you share with someone on the network or locally can be altered if you give the new user access to do so. However, you can limit the remote user’s access to only read the file and not have permission to write to the file. This is accomplished through the Share functionality.
1. Open the Windows Explorer (Start menu, then Computer).
2. Find the folder you wish to share using the folder tree on the left.
3. Click the folder.
4. In the preview pane on the right, select the folder with a single click.
5. Select Share from the toolbar on the top.
6. Choose the users who you wish to access this folder. If you want it accessible to anyone on the Network, then you must change the Network settings.
7. Select the type of Permissions for the added user: Reader, Contributor, or Co-Owner.
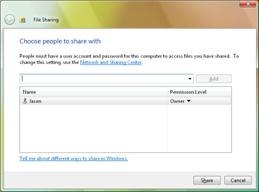
8. Click Share and wait for the sharing process to complete.
9. All the files are shared! Other local users or network users can now access these files.
NOTE: to undo file sharing, reverse the process, starting with selecting the folder and click on Share.