Connect to a Network Printer.
There are two methods to connect to a network printer: connect directly to an IP address or connect to a shared printer – on a server or workstation. The second method with a server is preferred as you can make changes to the print server and have it pushed out to all of the computers in the network easily versus the first method.
Can you imagine a situation where every user is using IP printing directly to an IP address and the IP address scheme changes? You would have to touch every computer in your company. If you used a print server and the IP address changes, you change it in one location and every computer in the enterprise is updated automatically.
How to Connect Directly to a Network Printer by IP Address
1.Open the Start menu, click on Printers and Faxes.
2.Click Add a printer.
3.Click Next.
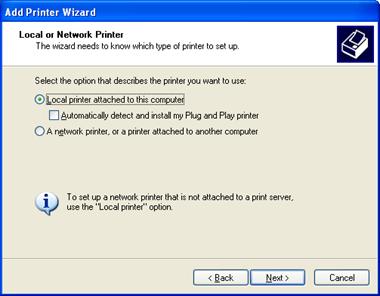
4.Select Local printer attached to this computer and uncheck Automatically detect and install my Plug and Play printer. Click Next.

5.Select Create a new port and select Standard TCP/IP Port. Click Next.

6.The Add Standard TCP/IP Printer Port Wizard opens. Click Next.

7.Enter the IP address of the printer you want to connect to and click Next.

8.If the computer can find the device, it will often identify the device type. If it cannot, it will ask you for the device type. Click Next to continue.

9.Click Finish to complete the wizard.

10.Select the Manufacturer and Printer model, click Next.

11.Name the printer and click Next.
12.Select whether or not to share the printer and click Next.
13.Choose whether or not to print a test page and click Next.
14.Click Finish to complete the wizard.

15.You have successfully installed a IP-based network printer.
Connect to a Shared Printer or a Print Server
Make sure you are logged into the computer as a domain user.
1.Open Printers and Faxes.
2.Click Add a printer.
3.Click Next.

4.Select A network printer, or a printer attached to another computer. Click Next.

5.Select Connect to this printer, leave the name blank and click Next.
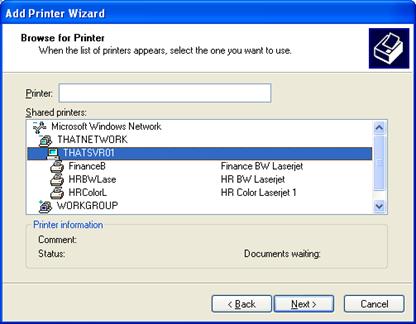
6.Select the printer you would like to install. Click Next.
7.Click Next.
8.Click Finish to complete the wizard.

9.You have now installed a network printer.
Alternative Network Printer Installation Method
There is a quicker alternative to installing a printer using the wizard:
1.Open Start and select Run.

2.Enter the server name, e.g. \\thatsvr01 and click OK.

3.Double-click on the printer you would like to install, e.g. FinanceB.

4.Windows will connect to the printer and add it to your list of Printers and Faxes.