Manage and troubleshoot access to shared folders.
Microsoft has made it very easy in Windows XP to share folders with other computers. This is both a benefit and a security risk, but one which we can mitigate as much as possible as a system administrator. In this section, we will look at how to create and remove shared folders, how to control access to them, and also look at Web server resources and Windows XP Pro.
Microsoft Windows XP Professional has two modes: simple file sharing mode and advanced mode. Earlier, we turned off Simple File Sharing and will be showing how to setup a shared folder using the advanced method.
Create and remove shared folders.
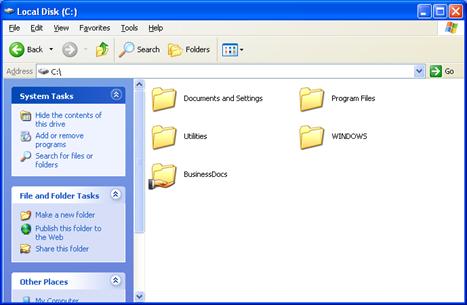
1.Open My Computer.
2.Open the drive you want to create a shared folder on.
3.Create a new folder and name is BusinessDocs.
4.Right-click on the folder and select Sharing and Security.
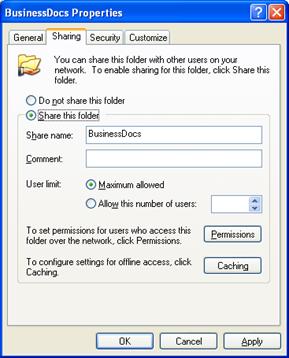
5.Click on Share this folder.
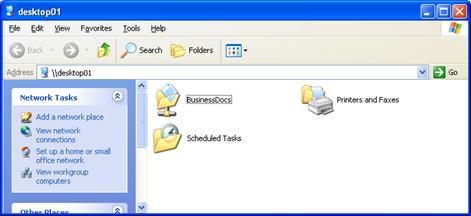
6.You can change the name of the share, or leave it as the default name. By default, if you navigate to the computer from a remote machine, e.g. using \\computername, you will see this as a share on the computer. This shows how the computer looks in a browse window:
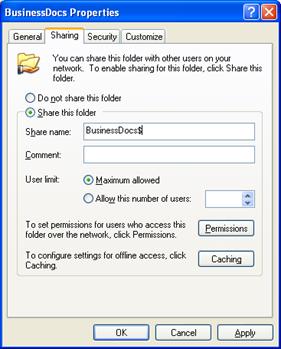
7.If you want the share to be hidden, end it with a $ sign, e.g.:
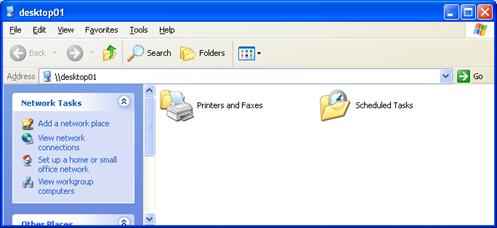
8.Now, the share is hidden and you won’t see it in a browse window:
9.Now that you have shared the folder, the icon changes:
Remove a Share from a Folder
10.Right-click on the shared folder and select Sharing and Security.
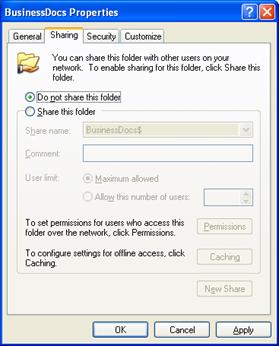
11.Click on Do not share this folder. Click OK.
Control access to shared folders by using permissions.
You can control access to your shared folders using permissions accessible on the folder properties dialog box.
1.Right-click on the shared folder (or a folder you’d like to share).
2.Select Sharing and Security.
3.If your folder is not shared, share it. Click Permissions.
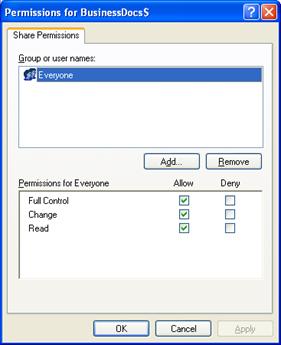
4.By default, Everyone has full control to the shared folder. Let’s remove that and make it Administrators only. Click the Remove button.
5.Click Add.
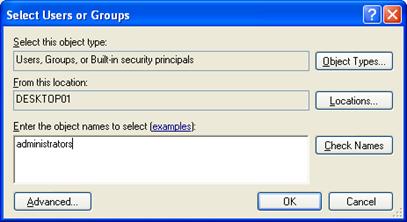
6.Type in administrators. Click OK.
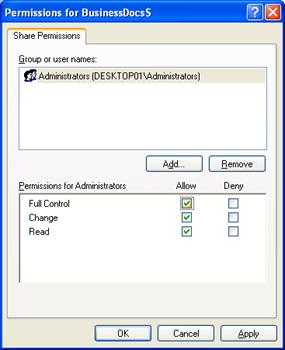
7.By default, it gives the group Read permission, click Full Control to give Administrators full control. Click OK.
8.Click OK to close the Properties window.