Creating Reports
You can create a range of reports using the Reports button at the bottom of most of the QuickBooks navigators. You can also select a report using the Report Finder:
- From the navigators list, select Reports.
The Report Finder opens.
- Select the type of report to view a list of reports in that category. Then select a report from the list. A preview of the report is displayed on the right side of the window.
- Select a date range for the report.
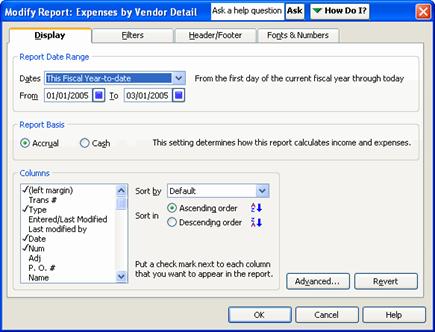
- To customize the report, click the Modify Report button.
This opens the Modify Report dialog, which contains various options for the report you selected. For instance, you can select which columns to include in the report, select filters to limit the data included in the report, change the headers and footers and change the fonts used for column and row labels, data and other elements.
Make your selections and click OK to close the dialog.
- Click Display to view the report in the Report window. Or, click Print to print a hard copy of the report.
Clicking Excel opens the report in Microsoft® Excel.
Closing Your Books for an Accounting Period
When you close your books at the end of an accounting period, you restrict access to transactions from prior accounting periods. To enter a closing date for your books:
- From the Edit menu, select Preferences.
- In the Preferences window, select the Accounting icon from the list on the left.
- Select the Company Preferences tab.
- Under Closing Date, enter the date through which you want your books closed.
- To limit access to the closed period, click the Set Password button.
- In the window that opens, enter a password and click OK.
- Click OK to close the Preferences window.
Historical transactions are still visible, but the password is required in order to modify or delete any of the transactions, as well as to enter new transactions prior to the closing date.
In this section, you learned how to:
- Open your company file
- Order and receive items
- View Purchase Orders
- Create Purchase Orders
- Enter bills
- Pay bills
- Write a check
- Pay sales tax
- Record sales
- Receive payments
- Create a sales receipt
- Deposit payments
- Reconcile your bank account
- Adjust inventory
- Create reports
- Close your books