Adding Inventory to Peachtree
Users may add inventory by selecting “Inventory & Services” from the menu on the left side of the screen and then choosing “Inventory Items” in the “Inventory & Services” pane and clicking on <New Inventory>. A screen will be displayed that allows information for new inventory to be entered. Click save in the upper left corner just under the primary menu when finished.
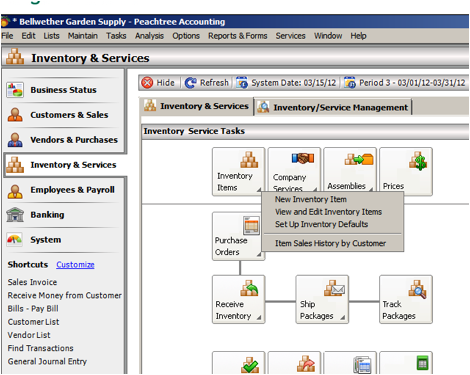
To edit inventory:
Select <View and Edit Inventory> from the dropdown menu under “Inventory Items.” You may edit the information displayed in the customer table by selecting <Settings> from the toolbar. You will then be able to add or remove fields. To edit inventory, locate the item you wish to modify by either scrolling through the table or searching by customer name or id. Then click <Open> on the toolbar at the top of the screen just under the primary menu.

To set up inventory defaults:
Select <Set up Inventory Defaults> from the dropdown menu under “Inventory Items.” You will then be able to choose your inventory defaults. When you are finished, click <Okay>.
Paying Bills
Paying a Bill
“Pay Bills” can be accessed by choosing “Banking” from the menu on the left side of the screen and then “Pay Bills” in the “Banking Tasks” pane. To pay a single bill, select the <Pay Bill> option from the dropdown menu. A screen will appear that allows you pay a single bill. Click <Save> when you are finished entering the information. It’s also possible to pay multiple bills by choose the <Pay Multiple Bills> option from the dropdown menu.
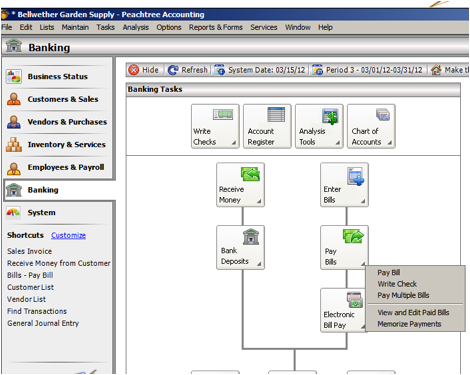
To schedule a recurring payment for a bill:
Select <Recur> from the toolbar at the top of the screen. When you are finished, click <OK>.
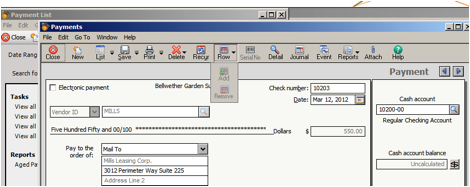
Add a line by clicking <Row> on the toolbar at the top of the screen just under the primary menu. Then choose <Add> from the dropdown menu. A blank row will appear at the bottom of the bill. If you wish to insert a new row between two rows, highlight the row beneath where you wish to add a new row, click <Row> and then <Add>.
Delete a row by highlighting the row you wish to delete, selecting <Row> from the toolbar at the top of the screen, and then <Remove>. You will not be asked to verify that you wish to remove the highlighted row, so be sure that you’ve selected the correct row to delete. Note that the remove option remains grayed out until you highlight a row to delete. It’s also important to note that clicking <Delete> on the toolbar at the top of the screen will erase the entire bill. The “Delete” option should ONLY be selected if you wish to delete the purchase order in its entirety. Bills flagged as paid in full cannot be deleted.
You may also enter events for Bills.
To enter an event for a bill:
Select <Event> from the toolbar in the upper middle of the screen just under the primary window. A popup will appear and you will then be able to enter call, letter, or meeting information as well as comments. When you are finished, click <Save> on the menu bar at the top of the popup or click <Recur> to schedule the event as a recurring one.
To write a check without accessing an existing bill:
Select <Write Check> from the dropdown menu under “Pay Bills.” You will then be able to enter information for the check. You may also schedule the check as a recurring event by clicking <Recur> on the toolbar at the top of the screen. When you are finished, click <Save> to print later or <Print> to print immediately.
You may view and edit paid bills by selecting <View and Edit Bills> from the dropdown menu under <Pay Bills>. Locate the bill you wish to edit by scrolling through the table or searching for it using the vendor name or id. To add or delete rows, schedule a recurring bill, or add an event follow the instructions for paying new bills above. You may also view details for a bill by highlighting a transaction and selecting <Detail> from the toolbar at the top of the screen.
It’s also possible to setup E-bill payment using your Peachtree Accounting Software. E-bill payment is an added convenience that saves time and money by eliminating paperwork and expediting the payment process. Users who would like to learn more about Peachtree’s E-bill services can click on “Electronic Bill Pay” in the “Vendors and Services Tasks” pane.