Starting Microsoft® Word
To start Word, do one of the following:
· From the Windows Start menu, point to All Programs, then Microsoft Office, and then select Microsoft Office Word 2007.
Note: The path may be different on your computer, depending on the settings used during installation.
· Use a shortcut to the program. The Microsoft Word shortcut icon may appear at the top of the Start menu, in the Windows taskbar, and/or on the desktop.

The Microsoft Office Button
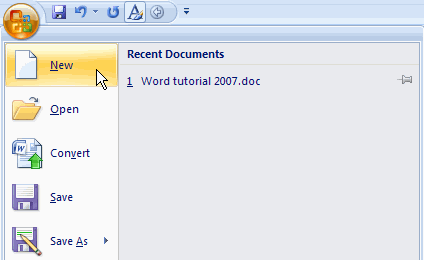
Word’s file management commands are now tucked into a menu behind the Microsoft Office button in the top left corner of the window. Click the button to access commands for opening, saving, printing, e-mail and publishing files:
Commands with right arrows next to them open submenus with more commands. In general, clicking a button with an arrow next to it will execute a default command, while hovering over the button or clicking the arrow next to it will open the related submenu. For example, if you click Print, Word opens the Print dialog box, but if you hover over the Print command or click the arrow button next to it, Word opens a submenu with more commands for printing:
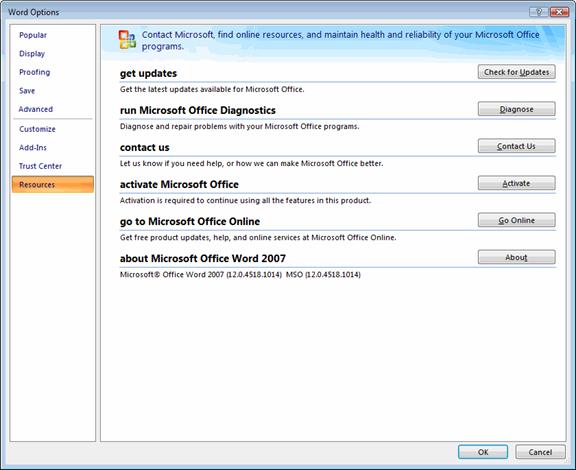
The Microsoft Office button menu is also the place to find Word Options, which lets you define all your preferences for the program. These include typing and editing preferences, spell check preferences and page display preferences. The Word Options dialog also has a screen for running Office diagnostics, activating your copy of Word and accessing Microsoft Office Online help resources.
The Quick Access Toolbar
The Quick Access toolbar-the small area just to the right of the Microsoft Office button-gives you a fully customizable place for commands you frequently use. By default, it includes a Save and Undo and Redo buttons.
![]()
To add or remove buttons, click the Microsoft Office button, click Word Options at the bottom of the menu, and, in the Word Options dialog, go to the Customize category.
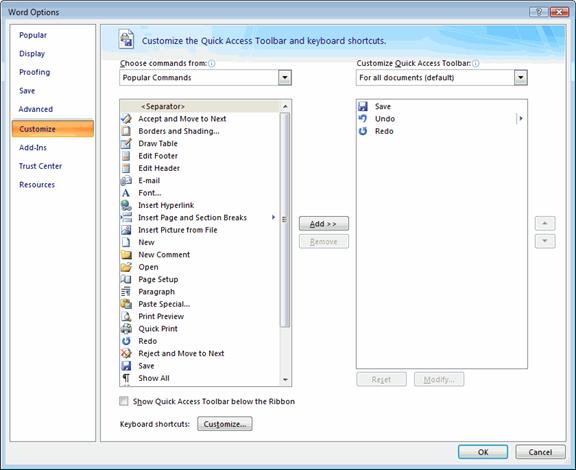
Here, add buttons to the toolbar by selecting commands from the list on the left and lcick the Add button. To remove a button, select it from the list on the right and click the Remove button.
Note that you can use this screen to customize keyboard shortcuts, too.
The Ribbon
The Ribbon is the series of tabs located along the top of the Word 2007 window. Each tab groups together related commands, sometimes using drop-down menus (indicated by small down-arrows) to further group commands:
- Home – Edit and format the text and objects in your documents.
- Insert – Insert objects into your documents, including pictures, tables, charts, text boxes and symbols, as well as headers and footers and page numbers.
- Page Layout – Design the pages of your documents by setting margins, orientation, spacing and indentation and document themes.
- References – Add a table of contents, footnotes, captions and citations, and manage bibliographic sources.
- Mailings – Create a mail merge and print envelopes and labels.
- Review – Track changes, add and review comments, check the word count and run a spell and grammar check.
- View – Change how the document appears on screen.
- Add-Ins – Commands that appear when you install a program that includes a Microsoft Word plug-in.
The Ribbon is undoubtedly the most disconcerting change made to Word, mainly because we’re so used to accessing a myriad of dialog boxes from standard Windows menus. Although the Ribbon’s tabs (which are still relatively consistent among Office applications) are reminiscent of the pre-2007 menus, you’ll find that they’re geared more toward quickly accomplishing a large set of common, related tasks than grouping all related commands in one place.
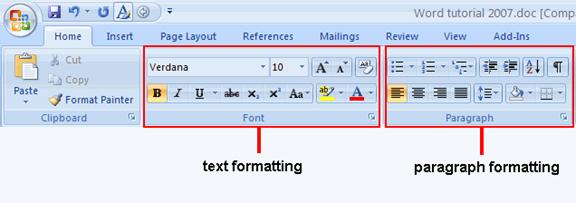
For this reason, the same commands can appear on several tabs, so you can, for example, adjust line spacing with other text formatting options on the Home tab or with other page formatting options on the Page Layout tab, depending on what you’re working with at the moment (a paragraph of text or the pages of the document).
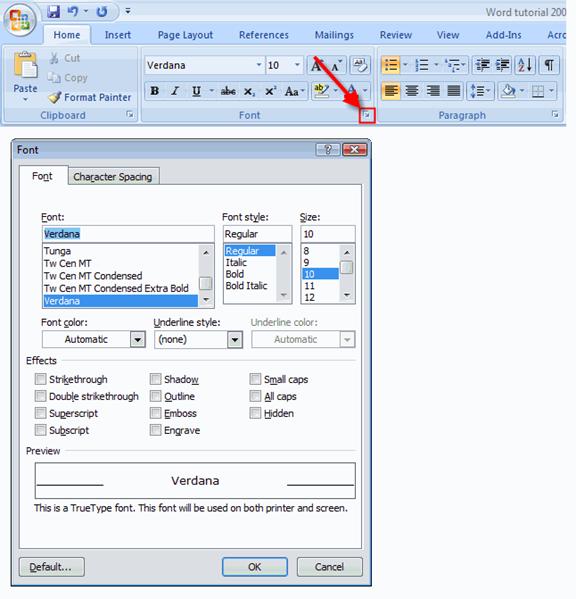
On the other hand, the dialog boxes you’re probably used to using are neatly hidden: Don’t bother looking for a “Font” or “Paragraph” command, like you once found in the menus. Microsoft hasn’t removed the dialogs; they’re still there, and you can access them by clicking the tiny More icon in the relavent group. So if you’re hunting for the character spacing commands, click the More button in the Font group; this opens the Font dialog, where you’ll find the commands you’re looking for on the Character Spacing tab.
The Status Bar
The status bar at the bottom of the Microsoft Word window displays information about the document and the current position of the cursor.
![]()
For example, the status bar may display:
- The section number.
- Formatted page number. This is based on the numbering you’ve defined, so if you’ve set the first page of the document to begin at page 10, then on the first page the status bar will display “Page 10.”
If you’ve inserted section breaks into your document, Word displays the page number defined for that page in the section. For example, if the first section of your document is a cover page, and the second section is front matter, such as a table of contents, and the third section is Chapter 1 of a report, and you’ve set the front matter (Section 2) to begin on page iv and Chapter 1 (Section 3) to begin on page 1, when you position your insertion point on the first page of Chapter 1, the status bar will display “Page 1” and then “Sec 3.”
- Page number. The physical page number. If you’ve set the first page of the document to begin at page 10, the first page will still be displayed as “1” out of the total number of pages (for example, “Page: 1 of 25”).
- The line number.
- The word count.
- The spelling and grammar check status. This is displayed on the book icon in the status bar. If an error is found, an X appears on the book. Double-click the book to see Word’s suggestion for correcting the error.
What the status bar displays depends on how you customize it: Right-click on a blank area of the status bar to see a menu of options:
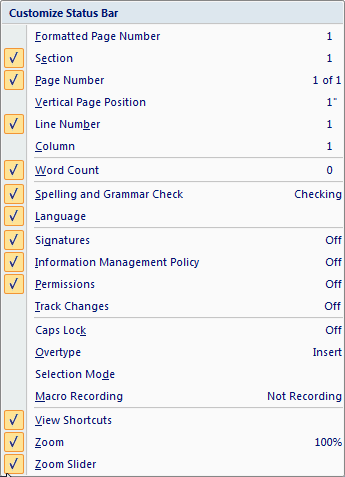
Checkmarks indicate information and features currently being displayed. To remove one from the status bar, just uncheck it. Select other features that you want to display. When you’re finished, click away from the menu to close it.
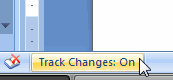
Word 2007 gives you the flexibility to hide or display not only document information but also features that can be turned on and off. For example, when the Track Changes feature is displayed in the status bar, it appears as a button that toggles the feature on and off; below, the feature is turned on, but clicking it turns it off.
Tip:
In Word 2007, the typing modes Insert and Overtype can only be toggled by clicking the Insert button on the status bar, unless you re-enable the Insert key through Word Options (see Inserting and Deleting Text). If the Insert button isn’t displayed on the status bar, select Overtype from the customization menu.

Microsoft disabled the Insert key presumably because users frequently hit it by mistake.
Finally, disk and printer icons may appear when Word is autosaving or background printing the document, respectively. When you’re printing a document, Word displays the number of the page currently being printed next to the printer icon.
Creating a New Document
To create a new document:
- Click the Microsoft Office button
 in the top left corner of the Microsoft Word window.
 - In the menu that opens, click New.
This opens the New Document dialog box:
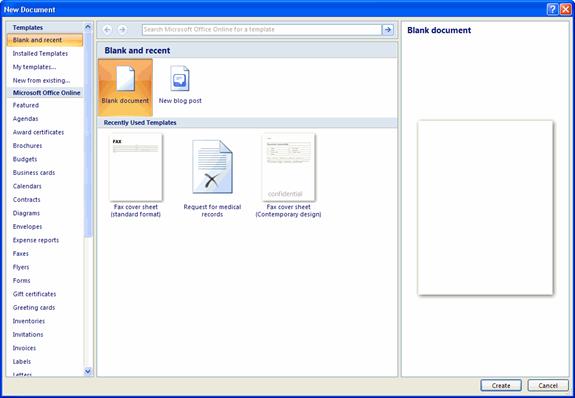
The New Document dialog box displays the templates available in Word. Templates offer reusable designs for multiple documents. When you create a document based on a template, Word copies the template file (which has a special .dotx extension) and gives it a document file extension (.docx). Documents based on a template will share the same structure and formatting; all you have to do is plug text into the predefined sections. The most basic template in Word is Normal.dotx, which is the default template on which all new, blank documents are based.
Word includes pre-defined templates for a variety of purposes, and more can be downloaded from Microsoft Office Online. In fact, Word 2007 has streamlined the process of selecting and downloading templates from the web site, so it’s almost as if all the available templates are already installed on your machine.
Tip:
Be sure you’re running an activated version of Word before trying to download a template! If your installation hasn’t been activated, Microsoft will prompt you to activate it.
By default, Blank and recent is selected in the left pane and Blank document is selected in the middle pane. This opens a new, blank document based on the default template (Normal.dotx).
Templates you’ve used recently appear under Recently Used Templates in the middle pane.
Using the list on the left side of the dialog box, you can select from a variety of templates that are automatically installed with Word or available from the Microsoft Office web site. Installed Templates displays some standard templates that are installed with Word; these are for letters, faxes, reports, resumes and blog posts:
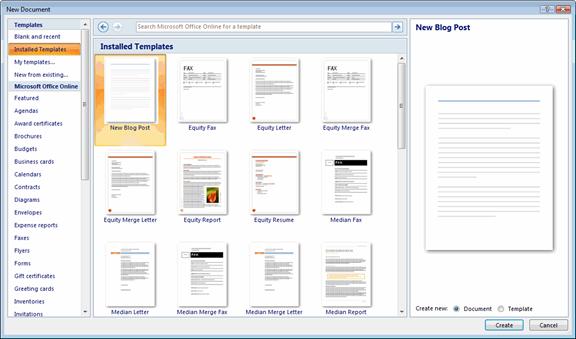
Note that Word displays a preview of the template in the right pane of the dialog box.
Choosing My templates opens a dialog with the templates you’ve downloaded and created:
Particularly useful is the ability to use an existing document as a template, even if that document wasn’t created as a template. Just choose New from existing and navigate to the document you want to use. Once you use an existing document as a template, it appears in My Templates.
Tip:
You can also design your own template from scratch, or save a document you designed as a template so others can create new documents based on it. To save a template, just save the file as you would a document, but choose Save as Template from the Office button’s Save As submenu:
3. When you’ve selected a template, click Create (or OK, if you’re choosing from My Templates). To create a new, blank document, make sure Blank and recent is selected under Templates and Blank document is selected in the middle pane.
Tip:
You can also create a blank document based on the default template by pressing Ctrl + N on your keyboard.
Or, if none of the installed templates suits your needs, you can download one. Just choose a category from Microsoft Office Online, and Word will preview the available templates in the dialog for you:
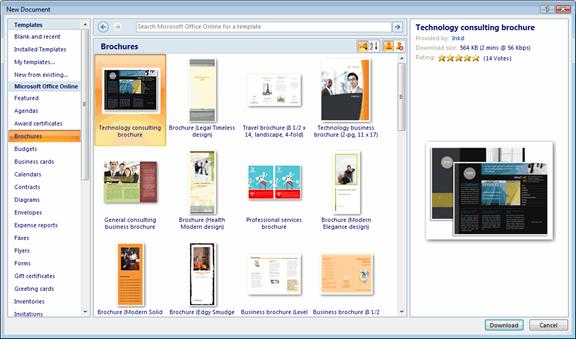
When you see one you like, click Download, and Word will open a new document based on the template.