Working with Quick Parts
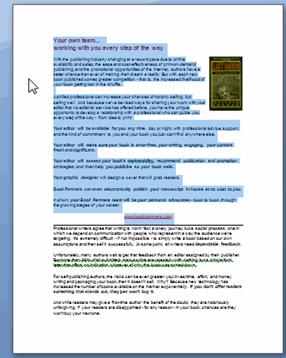
Quick Parts are building blocks that don’t fit into Word’s other galleries. Practically speaking, they are virtually any content that you want to save for the purpose of reusability, including text, formatting, images and hyperlinks. For instance, if you have some boilerplate introductory material you include in every business proposal, with a nice heading and preformatted text, the company logo, a picture of the president and the company’s web site address, you can save this entire section of boilerplate as a Quick Part that can be dropped into any document with the click of a button.
Tip:
If this sounds like a fancy form of AutoText, you’re right! In Word 2007, Microsoft has incorporated AutoText into the Building Blocks feature, and you’ll see at least two AutoText entries in the Building Blocks Organizer: your name and your initials. However, if you prefer to use the old AutoText gallery, the next section shows you how to add it to the Quick Access toolbar.
To save content to the Quick Part gallery:
- Select the content you want to save as a Quick Part.
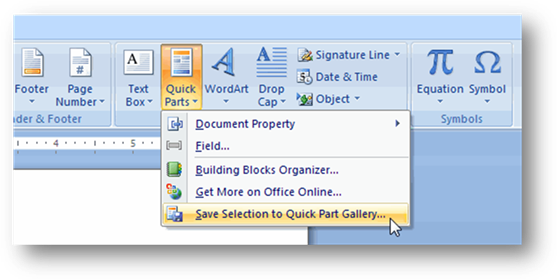
- On the Ribbon, select the Insert tab.
- In the Text group, click the Quick Parts button.
- In the menu that opens, select Save Selection to Quick Part Gallery.
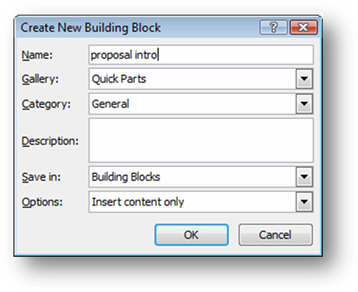
- In the Create Building Block dialog box, give the Quick Part a name and select the gallery, category and options for inserting the content. Note that you don’t have to add the Quick Part to the Quick Part gallery-you can choose from any of Word’s galleries, which appear in the Gallery drop-down menu.
Tip:
Recall that you can save building blocks, including Quick Parts, in other document templates, which you can share with other users. This is described in Creating New Building Blocks.
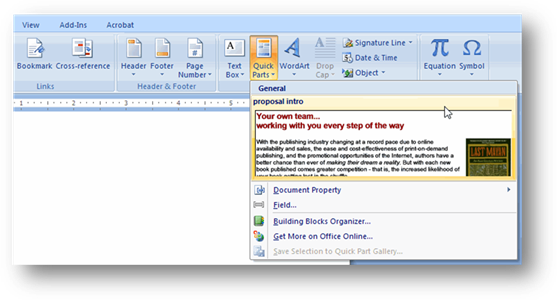
The Quick Part now appears in the gallery you chose:
The Quick Part gallery also lets you insert document properties and other fields. For example, to insert a document property, select Document Property from the Quick Parts button menu, and then select the document property you want to insert:
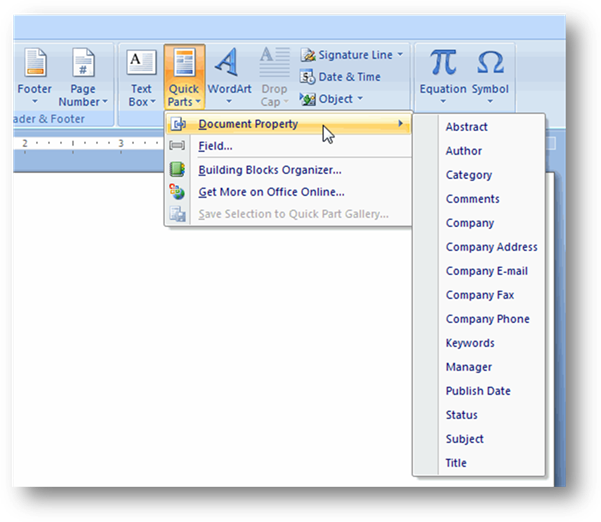
These properties are all fields that you can complete when you display document properties:
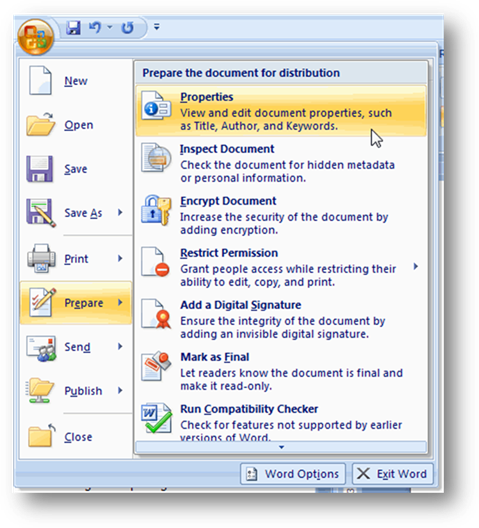
![]() Â Click the Microsoft Office button and then from the menu select Prepare and then Properties.
 Click the Microsoft Office button and then from the menu select Prepare and then Properties.
This displays the property fields at the top of the document window:
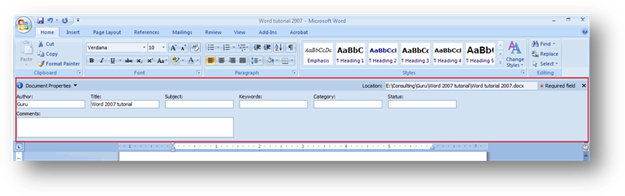
With the exception of the Location field, which displays the location where the document is saved, you can edit these fields by typing directly into them. Whatever you enter into the fields will be inserted when you choose a document property from the Quick Part gallery.
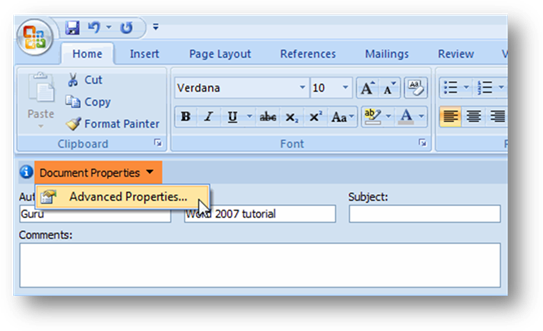
Notice, however, that not all of the properties you saw in the gallery appear at the top of the window. You can find the rest of them by clicking the small down arrow to the right of Document Properties and selecting Advanced Properties:
This opens the Properties dialog for the document:
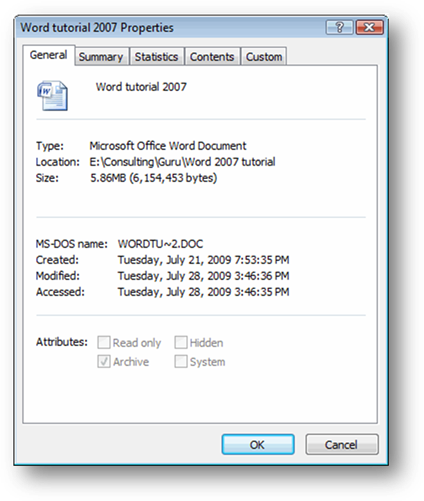
In terms of editing document properties for insertion in the document later, the key tabs are Summary and Custom. The Summary tab has all the fields appearing at the top of the document window, plus a few more, like Manager and Company:

Here, too, you can type directly into the fields.
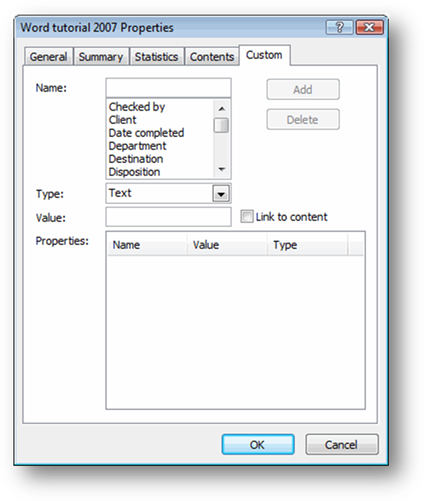
The Custom tab lets you add yet more, lesser-used fields to the document properties:
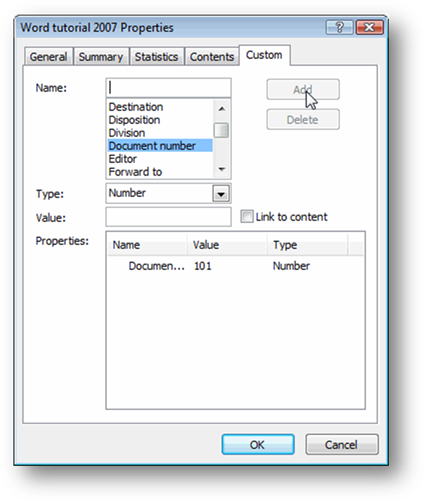
For example, below, a document number has been added with a value of 101:
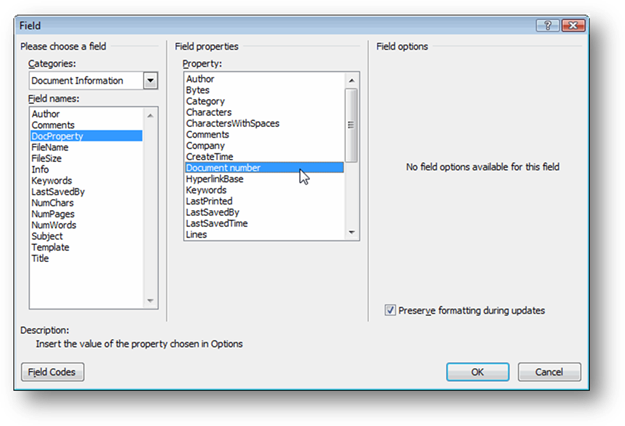
To insert that number somewhere in the body of the document, select Field from the Quick Parts button menu (because document number isn’t a field available in the Document Property submenu).
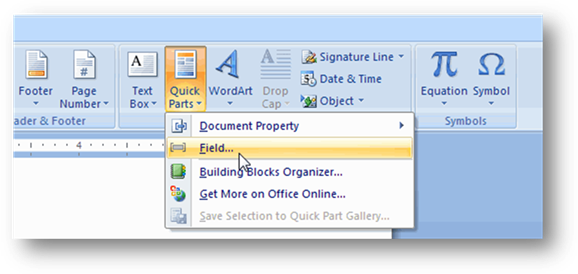
In the Field dialog, you can find document number in the Document Information category, under the field name DocProperty.
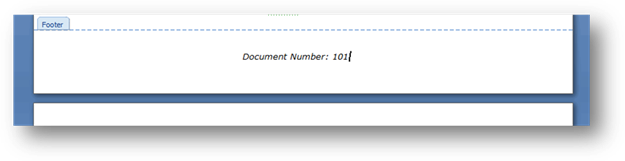
Click OK to insert the property’s value at the cursor position. For example, below, the document number has been added to the footer of the document:
Fields are useful because they can be automatically updated, so if you have the value inserted in several places in the document, you need only update the value of the field itself (by updating the document properties in this case), and Word updates it throughout the document.