Adding Borders
In Word, you can add custom borders to a paragraph or to entire pages. The quickest way to add a border to a selection of text is to use the Border button in the Paragraph group on the Ribbon’s Home tab. Clicking the arrow on the right side of the button opens a menu of border options:
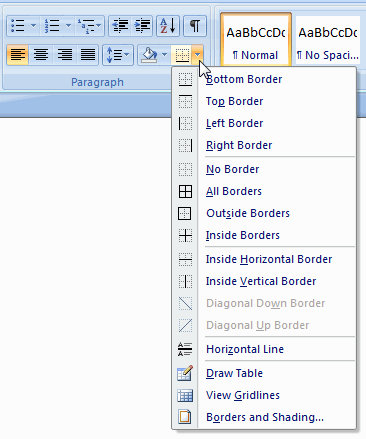
Word remembers the option you choose from this menu, so the next time you click the button, the same border is applied.
To see more options, select Borders and Shading from the menu. This opens the Borders and Shading dialog box, where you can change the border color, width and style, or apply a border to the entire page:
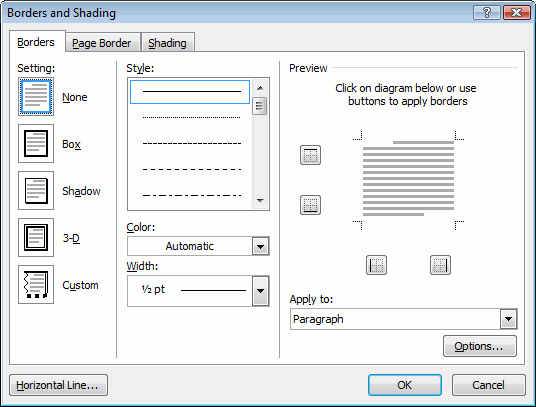
To add a border to selected text, select the Borders tab. Under Apply to, make sure Text or Paragraph is selected as appropriate.
To add a border to the pages of your document, select the Page Border tab. Under Apply to, select either Whole Document or one of the This Section options.
Under Setting, select the type of border you want to use.
Tip:
You can use the Preview pane to apply the border manually, and you should do this if you’re adding a custom border. Simply click the button indicating the side where you want to apply a line. Click the button again to remove the line. You can also click on the edge of the picture to apply a border to that side without using the buttons.
Note:
If you change the line style, color, or width after applying a custom border, you will need to remove the border using the Preview pane and then reapply it. When you reapply the border, it will appear in the Preview pane with your new line style settings.
Tip:
To adjust the amount of space between the text and the border, click the Options button.