Entering and Revising Data
Understanding Cell References
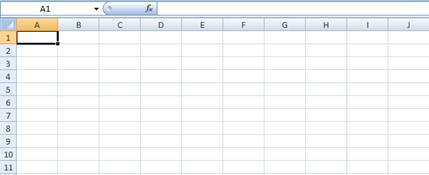
Excel references cells in the grid by a letter code on the horizontal (displayed at the top) and a number code on the vertical (at the left). To reference a specific cell, you specify the letter first and the number second, for example, the top most left cell is A1. A2 is one cell down, B1 is one cell to the right, and so on. If we specify for you to enter data in B2, you will move to the second cell in the spreadsheet to right and second cell down:
You will also see above the spreadsheet grid at the far left is the reference to the cell you are currently in.
Entering Data in Microsoft Excel
![]()
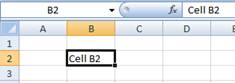
1. Go to cell B1.
2. Type in Budget.
3. Press Enter.
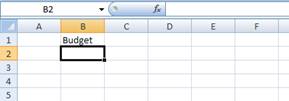
You should now see a spreadsheet that looks like this:
There are two ways to edit the data in cell B1. You can double-click on the cell and it will let you edit directly in the cell, or you can click on the cell and click on the data in the Function Bar.
Editing Data Using the Function Bar
1. Click on cell B1.
2. 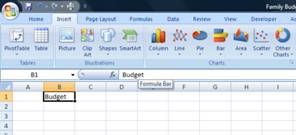
3. Click on the word Budget in the Formula Bar.
4. You can now change, edit, or delete the contents of the cell. We are going to leave the cell as it is.
We’re creating a family budget, so we need some categories to put income and expenses in.
Setting Up Our Budget Categories
1. Click in cell A2.
2. Type in Wages. Press Enter. Don’t worry about formatting right now, we will format the labels and categories later.
3. Type in Interest. Press Enter.
4. Type in Self-Employment. Press Enter.
5. Type in Miscellaneous. Press Enter.
6. Type in Income Total. Press Enter.
7. Your spreadsheet should look like this:

8. You know, I think a better description for cell A3 should be Interest/Dividends instead of just Interest.
9. Click on cell A3.
10. Click again on the word Interest. An edit mark should appear, add /Dividends on the end of the word Interest:
![]()
11. Press Enter.
12. Our first categories are now setup. You will notice that several of the labels exceed the width of the column and overflow into the B column. Later, we are going to change the width of the column.
13. Let’s get back to creating our categories.
14. Click on cell A7. Type in Investments and press Enter.
15. Type in Retirement and press Enter.
16. Type in Education and press Enter.
17. Type in Mutual Funds and press Enter.
18. Type in Savings and press Enter.
19. Type in Expenses and press Enter.
20. Type in Housing and press Enter.
21. Type in Mortgage/Rent and press Enter.
22. Type in Maintenance and press Enter.
23. Type in Home Improvement and press Enter.
24. Type in Home Security and press Enter.
25. Type in Property Taxes and press Enter.
26. Type in Homeowner’s Insurance and press Enter.
27. Type in Utilities and press Enter.
28. Type in Water and press Enter.
29. Type in Gas and press Enter.
30. Type in Electric and press Enter.
31. Type in Trash and press Enter.
32. Type in Telephone and press Enter.
33. Type in Cell Phone and press Enter.
34. Type in Cable TV and press Enter.
35. Type in Internet and press Enter.
36. Type in Necessities and press Enter.
37. Type in Groceries and press Enter.
38. Type in Medical and press Enter.
39. Type in Insurance and press Enter.
40. Type in Life Insurance and press Enter.
41. Type in Health Insurance and press Enter.
42. Type in Auto Insurance and press Enter.
43. Type in Long Term Care Insurance and press Enter.
44. Type in Disability Insurance and press Enter.
45. Type in Transportation and press Enter.
46. Type in Car Loan #1 and press Enter.
47. Type in Car Loan #2 and press Enter.
48. Type in Fuel and press Enter.
49. Type in Parking and press Enter.
50. Type in Service and press Enter.
51. Type in Miscellaneous and press Enter.
52. Type in Charitable Contributions and press Enter.
53. Type in Entertainment and press Enter.
54. Type in Clothing and press Enter.
55. Type in Vacation and press Enter.
56. Type in Gifts and press Enter.
57. Type in Dining Out and press Enter.
58. Type in Children Activities and press Enter.
59. Type in Debt Repayments and press Enter.
60. Type in Credit Card #1 and press Enter.
61. Type in Credit Card #2 and press Enter.
62. Type in Credit Card #3 and press Enter.
63. Type in Credit Card #4 and press Enter.
64. Type in Loan #1 and press Enter.
65. Type in Loan #2 and press Enter.
66. Save your spreadsheet.
Whew! That was a lot of typing. At this point, your spreadsheet should look like this attachment:
Right now, the spreadsheet isn’t in a condition for us to actually enter data yet. We need some basic formatting to make it presentable and easy to enter data.