Macromedia Flash MX 2004 Part 2: Section 4
In this section, you will learn about:
- Publishing Flash for web use
- Evaluating download performance
- Flash and HTML
- Publishing Flash movies for CD-ROMs
Publishing Your Movie
Publishing Flash for Web Use
While you can use the Export Movie command in the File menu to quickly export your finished Flash file as an SWF file, the Publish command creates all the necessary components for publishing your final SWF file for the medium you need. For example, when publishing for the Web, Flash creates the HTML pages needed to contain your movie. These settings are defined in the Publish Settings dialog: From the File menu, select Publish Settings, or click on a blank area of the document and, in the Property Inspector, click the Settings button.
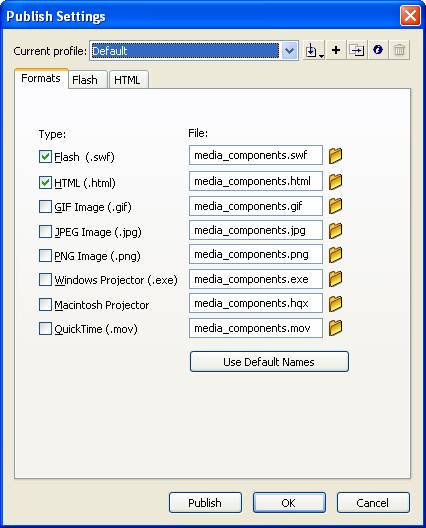
The first tab of the dialog, Formats, lets you select the medium for which you’re publishing:
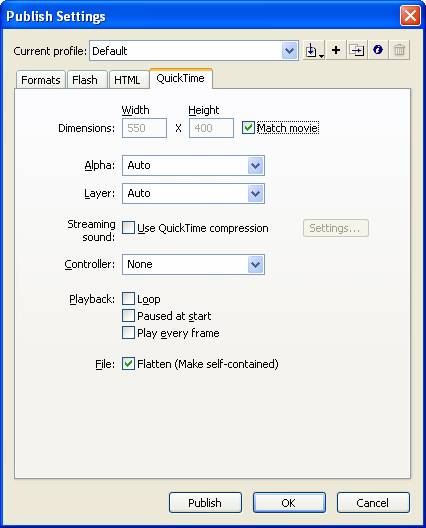
The selections you make here determine the availability of other tabs in the dialog. For example, if you select QuickTime, the QuickTime tab appears, which lets you enter playback settings for a QuickTime Flash movie:
If you’re publishing your movie for Web use, you want to select at least the first two options: Flash and HTML. Flash produces the SWF file that will be displayed in the HTML pages produced when you select HTML. The HTML pages already contain the code needed to display the movie.
To change the location where your files will be saved, click on the folder icon next to each of the selected formats. This opens a destination dialog, which you can use to navigate to the folder where you want to keep your final files.

Next, select each of the tabs in the dialog to define the settings for the formats you chose.
Most of the Flash settings are self-explanatory. By default, Flash Player 7 and ActionScript 2—the latest versions—are selected.
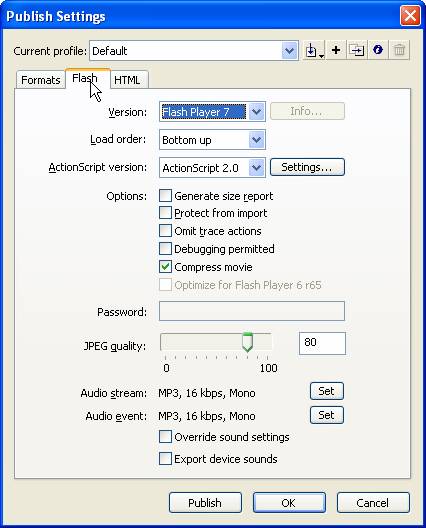
The load order determines in what order the layers for the first frame are loaded into the Player—from the bottom-most layer up or from the top-most layer down. If the ActionScipt in your movie uses the 2.0 version, select this option
. Otherwise, select ActionScript 1.0. If you used ActionScript 2.0, but need to compile the movie for Flash Player 6, Flash can do this—simply select the version 6 player from the Version menu.
The HTML tab lets you specify an HTML template to use with your Flash movie. The templates included with Flash contain tags specific for different uses and different types of Flash content:
- Flash for Pocket PC 2003 creates an HTML page that can display a Flash movie in Pocket IE, as well as in the desktop versions of IE and Netscape. Keep in mind that users of the Pocket PC are still limited to Flash Player 6.
- Flash HTTPS is for use on secure Web sites.
- Flash Only creates a basic HTML page with the tags that embed the Flash movie. It doesn’t include plug-in detection.
- Flash with AICC Tracking is for movies created using components from the Learning Interactions Library and that need to comply with AICC training guidelines.
- Flash with FSCommand should be selected if you’ve included the fscommand() action in your movie to communicate with JavaScript in your HTML pages.
- Flash with Named Anchors should be selected if you’ve included named anchors in your Main Timeline.
- Flash with SCORM Tracking is for movies created using components from the Learning Interactions Library and that need to comply with SCORM training guidelines.
- Image Map creates an image map from a frame in the Flash document.
- QuickTime creates an HTML page with the tags needed to display QuickTime Flash movies. If you’re publishing a QuickTime Flash movie, you should decide which QuickTime players are most likely to be in use and then, on the Flash tab, select the version of Flash that those players support.
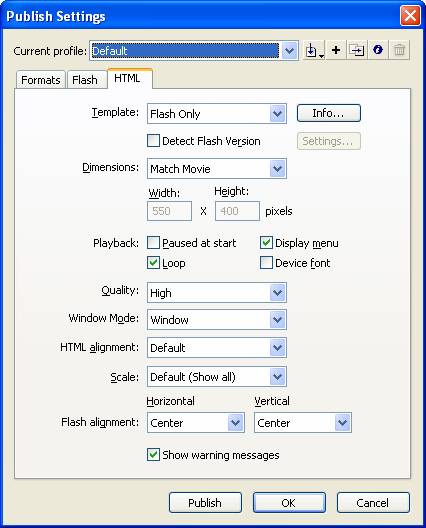
Under the Template menu, you can select Detect Flash Version to include HTML code to detect the version of the user’s Flash Player and direct him or her, if necessary, to a Macromedia download site.
The other settings on the HTML tab let you specify playback and quality, as well as how the movie will be displayed in the browser window. After the movie is published, you can open the HTML pages that were created in Notepad or a similar text editor and adjust the code as necessary to fine-tune the display.
To export the final files, click the Publish button. Otherwise, click OK to save your settings and return to the Flash document.