Macromedia Flash MX 2004 Section 2: Creating Graphics in Flash
In this section, you will learn:
- Creating graphics in Flash
- Importing graphics
- Using color effectively
- Creating a color swatch
- Layering Flash elements
- Masking content
- Organizing content in Flash
- Reusing graphics as symbols
Creating Graphics
Importing Graphics
While you can create simple graphics in Flash, more often than not, you’ll import the graphics you want to use into your Flash document. Flash supports a large number of graphics formats, including .gif, .jpg, .wmf, .pct, .tiff, .wmf, and Freehand, Illustrator and Photoshop image files.
To import a graphic into your document:
- From the File menu, select Import. From the submenu, select Import to Stage or Import to Library. Importing a graphic to the Stage places the graphic directly on the Stage, on the currently selected layer and frame, while importing to the library adds the graphic to the library. From the library, you can drag the graphic to the Stage whenever you need it.
- In the Import dialog box, navigate to the graphic you want to import, select it, and click Open.
The graphic appears either on the Stage or in the library:
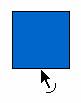
On the Stage, you can position the graphic by dragging it where you want:
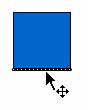
You can also use the Free Transform ![]() tool to scale or skew the graphic:
tool to scale or skew the graphic:


The Free Transform tool can be used on any image you place on the Stage—still or motion—Flash doesn’t care.
Creating New Graphics in Flash
Flash’s drawing tools are similar to those you’ll find in other programs, with a few differences. First, the drawing tools are fairly limited in number, with the basic pen, pencil and brush tools, a line tool and only three preset shapes: oval, rectangle and polystar. Second, Flash treats the stroke and fill as separate objects; both need to be selected in order to work with the object as a whole.
Flash creates vector art, which relies on geometric data (lines, curves and points). While vector graphics are generally smaller in file size than raster graphics and can be resized without loss of resolution, they aren’t appropriate for displaying complex color variations.
The main thing to keep in mind is that Flash is not a drawing program. Most often, you’ll want to create your images in drawing programs like Macromedia Freehand or Fireworks or Adobe Illustrator and then import them into Flash. You can, however, use Flash’s drawing tools to quickly create simple buttons or background areas. The tools are located on the Tools panel, which by default appears vertically along the left side of the Flash window:

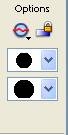
The drawing and selection tools are located at the top of the panel. When you select a tool, any options available for that tool are displayed at the bottom of the panel, under Options. For example, when you click the Brush ![]() tool, the following options appear:
tool, the following options appear:
Buttons with down arrows like the Brush Mode button shown above open menus containing several options:
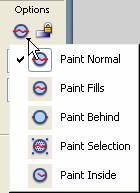
The Brush Mode menu lets you select where you want the paint to appear in relation to other objects on the Stage:
- Paint Normal paints over anything on the layer that the brush touches.
- Paint Fills paints fills and empty areas without painting over existing lines.
- Paint Behind paints the empty areas behind objects on the current layer, without painting over existing lines or fills.
- Paint Selection applies a fill to a selected object.
- Paint Inside paints inside the lines of an object, preventing you from painting over the lines.
Next to Brush Mode, the Lock Fill button is used for extending a gradient across the Stage, so when you select a gradient fill with the Brush tool, the paint you apply on one part of the Stage will differ in color from the paint you apply on another part of the Stage.
The drop-down menus at the bottom of the Options section let you select a brush size and shape.
The Brush tool has more options than any other in Flash. For example, the Pencil tool has only one menu button under Options, which lets you select a straight, smooth, or ink stroke. There are no options for the Pen tool, which is used to create lines and curves using points.
In general, you follow the same process to create a drawing in Flash, regardless of the tool you use:
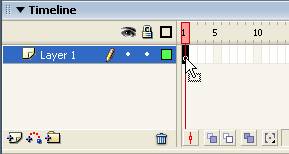
- Select the layer and frame on the Timeline where you want the drawing to appear.
- Click the tool on the Tools panel.
- Select any options for the tool. The available options are located at the bottom of the Tools panel.
- Select the stroke and fill for the object using the Colors section of the Tools panel or the Property Inspector.
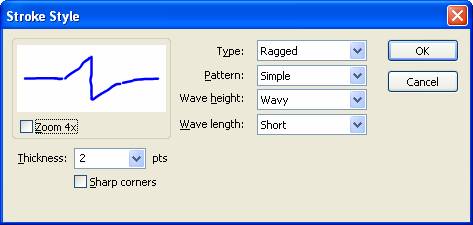
- For a shape, use the Property Inspector to define the appearance of the stroke (the lines, or border).

Clicking Custom opens the Stroke Style dialog, which provides a variety of stroke styles and patterns:
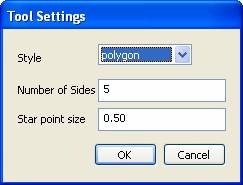
When drawing a polystar, click the Options button to define the number of sides:
- Click and drag on the Stage to create the drawing. Below, a rectangle is being drawn with the Rectangle
 tool:
tool:

Once you’ve drawn an initial object, you can use the Selection ![]() tool to select and move it, the Subselection
tool to select and move it, the Subselection ![]() tool to change the object’s shape by dragging the points (or nodes) along its path, and the Free Transform
tool to change the object’s shape by dragging the points (or nodes) along its path, and the Free Transform ![]() tool to scale or skew the object.
tool to scale or skew the object.
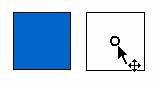
For example, to see how Flash treats stroke and fill, draw a simple rectangle, click the Selection ![]() tool, and then click the bottom edge of the rectangle:
tool, and then click the bottom edge of the rectangle:
Only the bottom line of the rectangle is selected:
Now drag the line away from the rectangle:
The line is separated from the rest of the object:

Flash treats the fill of an object the same way—that is, as a separate entity on the Stage. Click and drag inside the rectangle to separate the fill from the stroke:

The stroke and fill can be moved, modified and deleted independent of each other:
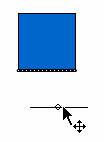
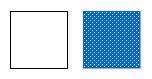
To select both the stroke and fill of an object, you must use the Selection tool to click and drag a boundary box around the entire object:
Selected elements are represented by a dotted pattern, as shown below:

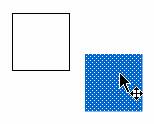
You can then move the object as a whole by dragging the selection:
At first glance, this seems an over-complicated way of working with simple graphics, but the flexibility of Flash’s selection and drawing tools makes it easy to quickly transform a simple brush stroke or shape into a completed graphic.
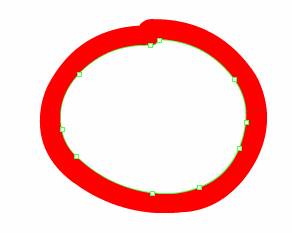
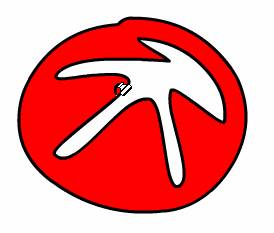
For example, the simple circle shown below was painted on the Stage using the Brush tool. The Subselection tool was then used to select the points along the inside of the circle (by clicking once just at the inner edge):
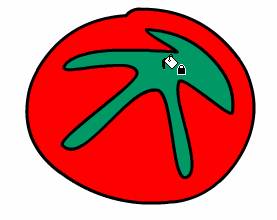
Clicking and dragging the points using the Subselection tool modified the interior shape of the object:
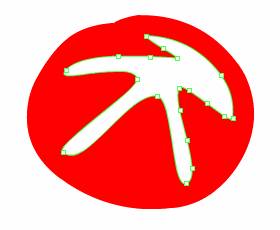
The Ink Bottle tool was then used to apply a black stroke along the outside of the object:
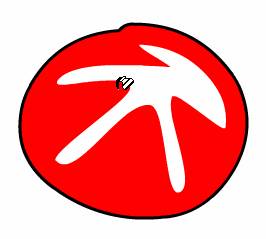
When you click near the edge of an object using the Ink Bottle tool, Flash automatically selects and changes the stroke to the selected stroke color, even if the object, like the brush stroke in our example, was drawn using only a fill.
The Paint Bucket tool works the same way. With the tool selected, we chose a green fill from the Colors section of the Tools panel and then clicked once inside the empty area of our object:
Again, it’s important to remember that Flash isn’t a drawing program—any complex graphics need to be created in another program and then imported into Flash. But the drawing tools Flash does include work well together to allow you to create simple graphics quickly.