Macromedia Flash MX 2004 Section 1: Introduction to Flash
In this section, you will learn:
- What’s New in Flash MX 2004
- Using the Flash Interface
- The Flash Timeline
- Creating a New Document (New Flash Movie)
- Changing Movie Properties
- Flash Panels
- Using the Movie Explorer
Introduction to Flash
What is Macromedia Flash MX 2004?
Macromedia Flash began as an animation tool and has evolved over time to become not only the software of choice for multimedia development, but also, with the implementation of MX and then MX 2004, a tool for developing Rich Internet Applications. It remains easy to use but incredibly powerful, and with a new component architecture and the implementation of object-oriented programming, Flash MX 2004 now rivals many of the industry-standard Web application programs.
What’s New in Flash MX 2004?
Flash MX 2004 2004 includes a large number of significant enhancements, not the least of which is the implementation of version 2 component architecture, which uses a broadcaster/listener event model. The Components panel now boasts over 30 components, though some of these are available only in the Professional version, and include enhanced accessibility features. All the components are based on classes and have predefined parameters and events, methods, and properties. Some of these provide the same functionality as earlier actions, but with the addition of a great deal more.
Also implemented is ActionScript 2.0, an object-oriented language developed to comply with ECMA script language specifications. ActionScript 2.0 supports inheritance, strong typing, and the event model.
The Behaviors panel contains pre-written scripts in ActionScript, which you can add to your movie for quick functionality. These include video playback behaviors, movie clip behaviors, and sound behaviors, among others. The new History panel tracks your actions, which can be reused.
In addition, Flash MX 2004 includes updated templates, an integrated Help system via a new Help panel, a spell checker, a find and replace feature, rich media support, small font size rendering, and a new Video Import Wizard, with pre-defined and customizable encoding options. AVI and MP3 movies can now be embedded in Flash documents, as well as QuickTime movies, which can be embedded or linked.
Flash MX 2004 also includes new publish profiles that let you save and reuse publish settings, as well as Flash Player detection in published files, which can direct users to alternate files if they don’t have the correct Flash Player version.
While the new component architecture and the implementation of ActionScript 2.0 has introduced a number of changes, many of Flash’s familiar features remain. As we progress through the tutorial, we’ll explore both, only touching on the more complex.
Using the Flash Interface
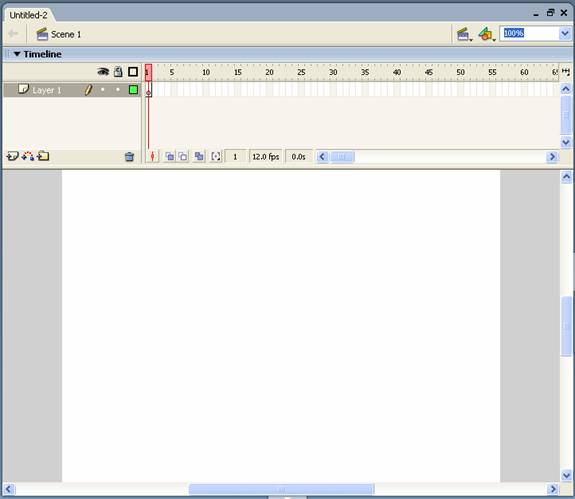
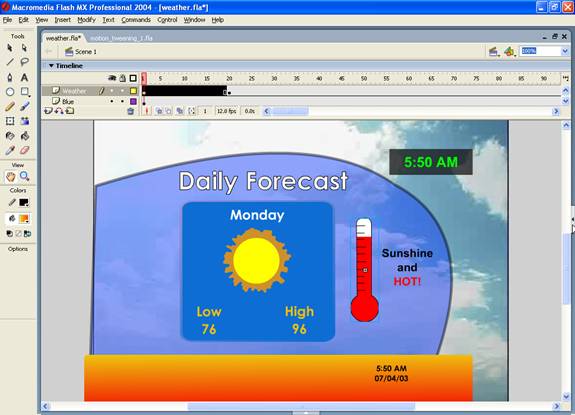
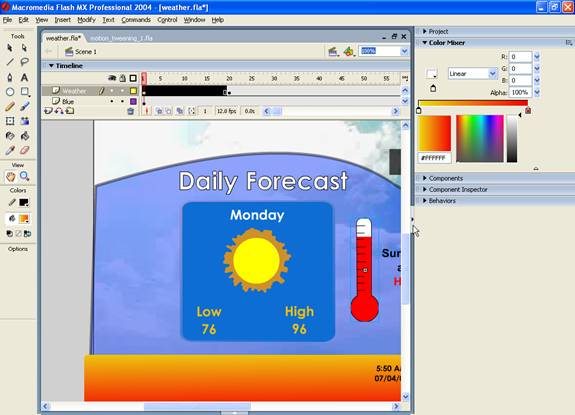
The Flash MX 2004 workspace consists of a Stage, a Timeline, and various panels that display information and let you define object properties and add ActionScript code. The Tools panel, which by default appears vertically along the left side of the Stage, contains drawing and selection tools for creating and manipulating objects on the Stage.

Open Flash documents are displayed on tabs in the main window. To switch from document to document, simply select the appropriate tab:
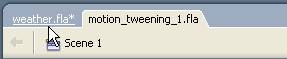
Notice that unsaved documents appear with an asterisk (*) next to their names.
The Stage is your main workspace. This is the area where you place the content as it will appear in your movie:
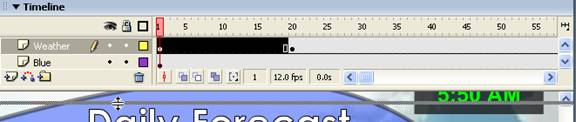
The flow of content is controlled by its location on the Timeline:
The Timeline consists of individual frames, which can be likened to a piece of paper in an old-fashioned hard-copy cartoon. As papers containing individual images are shuffled, motion is simulated. This is what Flash does: it uses the Timeline to simulate motion. By placing images, buttons, sounds and other objects into frames on the Timeline, you can control how and when those objects appear and disappear. By default, when a Flash movie plays, the playhead automatically moves forward through the frames to the end of the existing content, and then loops back to the beginning to play all over again. Later, you’ll learn how to control this behavior.
As you’re authoring, you can drag the playhead (the red vertical line) along the Timeline to view your animation-in-progress. At any time, you can view the contents of an individual frame by selecting it—clicking inside the frame in the Timeline. The frame number is displayed at the bottom of the Timeline:
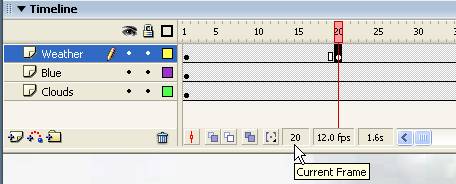
When you select a frame, the playhead moves to that frame, and the Stage displays all the objects contained in that frame.
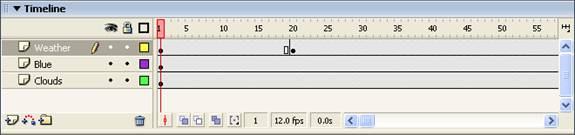
In Flash, there’s a special kind of frame called a keyframe, which is essentially a frame used for holding objects representing a change in the animation. For example, a moving car animation might have a car graphic in one location on the Stage in frame 1, and in a different location on the Stage in frame 20. As long as frame 1 and frame 20 are keyframes, Flash will keep the car in its original position until the playhead reaches frame 20; then, Flash displays the car in its new location on the Stage. A keyframe is represented on the Timeline by a black circle. When the circle is solid, an object resides in the frame; when it’s clear, no objects are contained in the frame.
In addition, layers let you organize your content in the Timeline, so you can work with different elements separately. Besides having layers that group related images, it’s standard to have a layer for buttons, a layer for sounds, and a layer for ActionScript code. You can insert as many layers as you need, and arrange and rename them as necessary. The layers are displayed on the left side of the Timeline. Objects are added to frames on the selected layer.
As you progress through the tutorial, you’ll learn more about placing Objects on the Stage, and about using the Timeline and adding layers. For now, it’s enough to familiarize yourself with the main features of the Timeline.
You can adjust the height of the Timeline by clicking and dragging along the lower boundary of the Timeline:
You can also use the scrollbars to scroll vertically and horizontally through the Timeline:

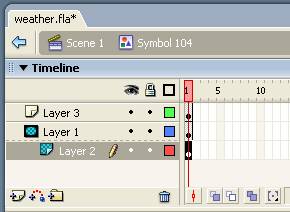
Just above the Timeline, Flash displays the name of the current scene. If you double-click on a symbol—a button, a graphic that’s been converted to a symbol, or a movie clip—Flash enters Edit mode for that object, and the name of the object appears above the Timeline next to the scene. Symbols have their own Timelines, which are displayed in place of the Main Timeline in Edit mode:
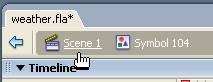
To exit Edit mode, all you have to do is click the name of the scene or the back button next to it.
You can easily switch between the symbols in your document using the Edit Symbols ![]() button:
button:
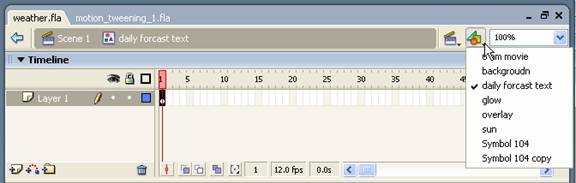
When you select a symbol, it opens in Edit mode.
The Edit Scene ![]() button lets you switch between the scenes in your movie. You can use scenes to group portions of your movies.
button lets you switch between the scenes in your movie. You can use scenes to group portions of your movies.
The Zoom menu ![]() , also located above the Timeline, lets you adjust the display of the Stage. A Zoom
, also located above the Timeline, lets you adjust the display of the Stage. A Zoom ![]() button also appears on the Tools panel, along with a Pan
button also appears on the Tools panel, along with a Pan ![]() button. Use the Pan button to move the Stage display.
button. Use the Pan button to move the Stage display.
Most of the buttons on the Tools panel are used for creating and transforming graphics in Flash. To display the Tools panel, select Tools from the Window menu:

In addition to drawing and selection tools, the Tools panel includes buttons and menus for defining objects’ stroke and fill colors and options for the selected tool. You’ll see this put to use later on.
Creating a New Document
Flash refers to movies in the authoring environment as “documents”. To create a new Flash document:
- From the File menu, select New.
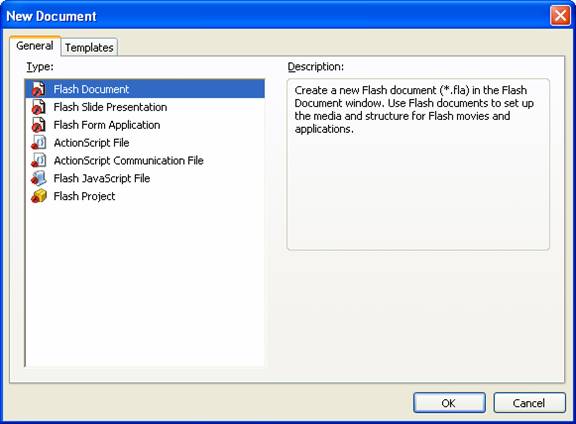
- In the New Document dialog, select the type of document you want to create. The dialog above shows document types available for Flash MX Professional 2004.
- Click OK.
To save a file, select Save from the File menu. If this is the first time you’re saving a file, you’re asked to enter a file name:
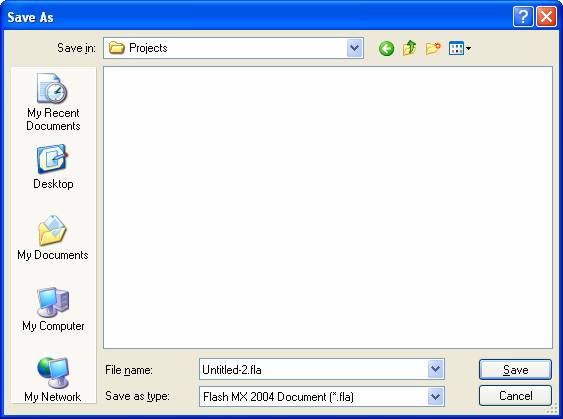
Remember to save your work frequently! Flash uses a lot of resources, and animating is time-consuming work—you don’t want to have to reproduce it if Flash crashes.
Changing Movie Properties
Movie properties can be set using the Property Inspector:
- If necessary, select Properties from the Window menu to open the Property Inspector.
- With no object on the Stage selected, the Property Inspector displays the document’s properties by default. If necessary, you can click on a blank area of the Stage, or outside the Stage in the grey area, to display the document’s properties:

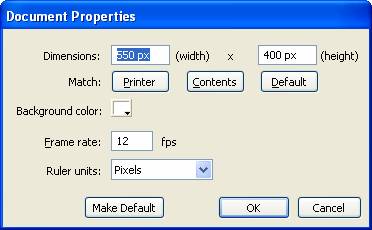
- To change the size of the document, click the Size button, which displays the document’s current size.

Clicking the Size button opens the Document Properties dialog, where you can specify the movie’s dimensions, background color, frame rate, and ruler units.
Tip:
12 frames per second (fps) is the default frame rate for Flash documents, and is usually sufficient.
- When you’ve finished defining the document properties, click OK to apply the settings and close the dialog.
Flash Panels
Panels generally appear in two places in the Flash window: vertically, along the right side, and horizontally, at the bottom of the window. Flash includes a large number of panels, many of which don’t appear by default; you can access these from the Window menu.
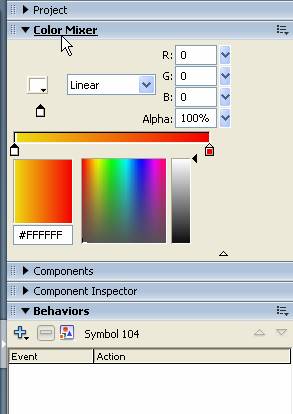
Panels display information about your movie, or about selected objects in the movie, and let you define properties and add ActionScript to control the Timeline. Some panels, like the Project panel and the Library panel, help you keep your work organized. For example, the Library panel contains “symbols” of objects that you can place on the Stage. Each time you drag a symbol from the library to the Stage, you create a new instance of that symbol. In this way, Flash promotes both efficiency and reusability.
You’ll frequently only use a few panels at a time, and these panels will vary depending on the tasks you’re performing. Some of the most common panels, which you’ll see in this tutorial, are the Color Mixer panel, the Behaviors panel, the Library panel, the Properties panel (also referred to as the Property Inspector), and the Actions panel.
Panels can be expanded or collapsed, and floated or docked, much like toolbars. To expand a panel, simply click on its name:
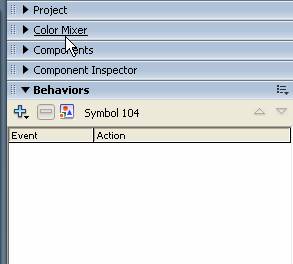
When you expand a panel, the other panels move to make room:
To collapse the panel, click its name again.
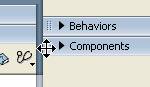
To float a panel, click on the gripper at the edge of the panel’s title bar and drag it away from the rest of the panels:
![]()
You can also drag a panel from the vertical group to the horizontal group, and vice versa.
Panels can be resized by clicking and dragging their outer edges:
![]() When you need the screen space, you can slide the panels off-screen by clicking the grey arrow button located just to the left of the vertical panels, or just above the horizontal panels:
When you need the screen space, you can slide the panels off-screen by clicking the grey arrow button located just to the left of the vertical panels, or just above the horizontal panels:
To display the panels, click the button again:
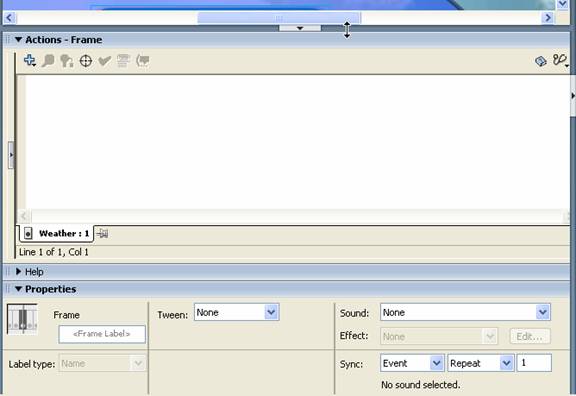
One of the panels you’ll use most frequently is the Property Inspector, which is located in the panel group at the bottom of the Flash window:

The Property Inspector is used to define the properties of the selected object.
Finally, some panels have an Options ![]() button located at the upper-right corner. Clicking this button opens a menu of additional options for that panel.
button located at the upper-right corner. Clicking this button opens a menu of additional options for that panel.
As you become accustomed to performing different tasks in Flash, you’ll probably devise several different comfortable arrangements of panels. You can save a custom panel set for reuse by selecting Save Panel Layout from the Window menu. When you save a panel layout, it becomes available in the Panel Sets submenu of the Window menu.
Using the Movie Explorer
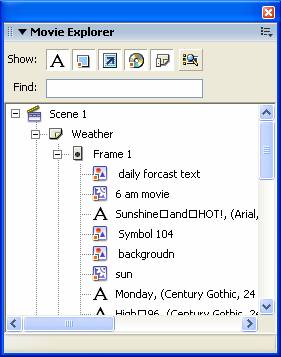
The Movie Explorer is a special panel that displays all the items in your movie, as well as your movie’s structure. You can use it to find a specific item, or to see an item’s relationship to other items in the movie.
To display the Movie Explore, open the Window menu and select Other panels and then Movie Explorer.
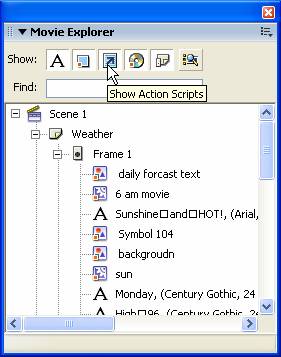
The Show buttons along the top of the Movie Explorer let you filter the items displayed in the list. If you move your mouse over a button, a yellow pop-up tells you what filter is applied when the button is selected:
Clicking the ![]() button lets you customize the items displayed using the Movie Explorer Settings dialog:
button lets you customize the items displayed using the Movie Explorer Settings dialog:

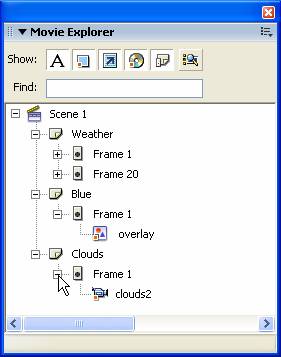
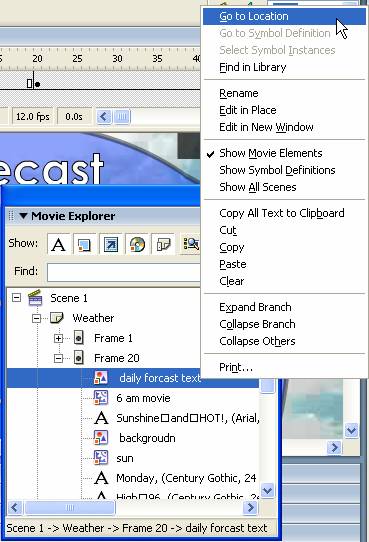
The Movie Explorer displays items hierarchically, first by scene, then by layer, and then by frame. Expand and collapse nodes in the tree by clicking the plus or minus sign next to the name of the item you want to expand or collapse:
If you’re searching for a particular item, you can use the Find field to enter its name. Once you’ve located it, you can right-click it or click on the Options button in the top right corner of the panel to see a list of options. One of the handiest is Go to Location, which selects the item on the Stage:
As your movies grow, the Movie Explorer can become an invaluable tool for sorting through the seeming mess of objects, layers, and movie clips.
Macromedia Flash MX 2004 Section 1: Introduction to Flash
In this section, you learned about:
- What’s New in Flash MX 2004
- Using the Flash Interface
- The Flash Timeline
- Creating a New Document (New Flash Movie)
- Changing Movie Properties
- Flash Panels
- Using the Movie Explorer